Hyundai Tucson: Interior / Roof Trim Repair procedures
| Replacement |
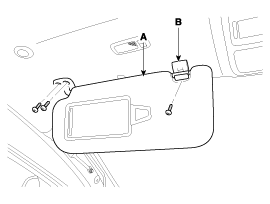
| 1. |
After loosening the mounting screws, then remove the sunvisor (A) and retainer (B).
|
| 2. |
Install in the reverse order of removal. |
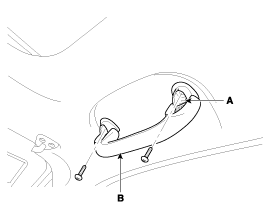
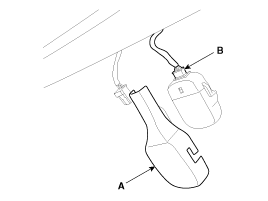
| 1. |
Remove the covers (A), and remove the screws, then remove the assist handle (B).
|
| 2. |
Install in the reverse order of removal. |
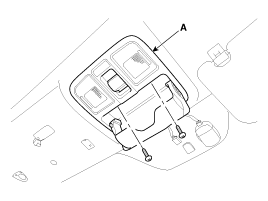
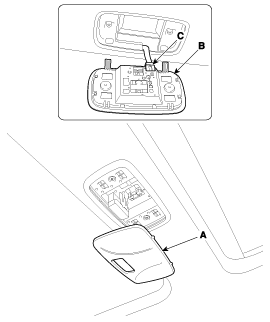
| 1. |
After loosening the mounting screws, then remove the overhead console assembly (A).
|
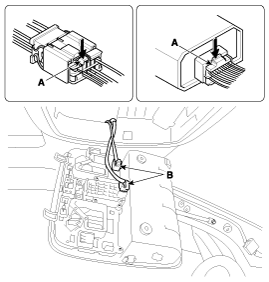
| 2. |
Push the lock pin (A), disconnect the connectors (B).
|
| 3. |
Install in the reverse order of removal.
|

| 1. |
Using a screwdriver, remove the cover (A). |
| 2. |
After loosening the mounting screws, then remove the room lamp (B). |
| 3. |
Disconnect the connector (C).
|
| 4. |
Install in the reverse order of removal.
|
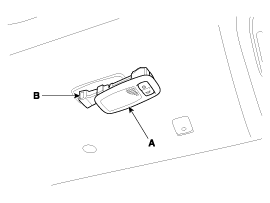
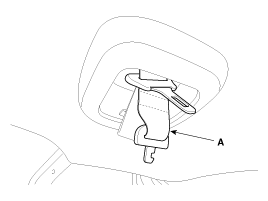
| 1. |
Using a screwdriver, remove the vanity lamp (A). |
| 2. |
Disconnect the connector (B).
|
| 3. |
Install in the reverse order of removal. |
|
| 1. |
Remove the following items.
|
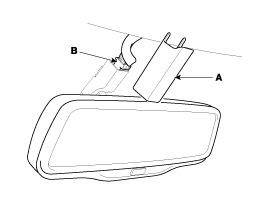
| 2. |
Disconnect the cover (A) and ECM room mirror connector (B).
|
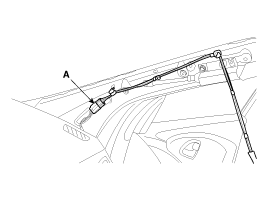
| 3. |
Disconnect the cover (A) and rain sensor connector (B).
|
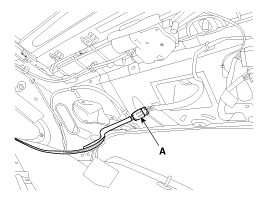
| 4. |
Disconnect the wiring connector (A), mounting clips.
[Driver's]
[Passenger's]
|
| 5. |
Push the lower anchor (A) of second row seat belt into the second center row seat belt cover.
|
| 6. |
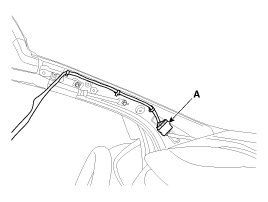
Disconnect the antenna connector (A).
|
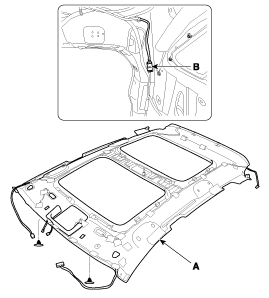
| 7. |
Disconnect the connector (B). |
| 8. |
Disconnect the clips and then remove the roof trim (A).
|
| 9. |
Install in the reverse order of removal.
|
 Roof Trim Components and Components Location
Components
1. Roof trim2. Sunvisor3. Retainer
1. Roof trim2. Sunvisor3. Retainer
...
 Interior Trim Components and Components Location
Components
1. Front pillar trim2. Center upper pillar trim3. Center lower pillar trim4. Rear pillar trim5. Cargo screen6. Cowl side trim7. Front door scuff trim8. Rear door scuff trim9. Front ...
Other information:
Hyundai Tucson (LM) 2010-2015 Owners Manual: High beam operation
To turn on the high beam headlights, push the lever away from you. Pull it back
for low beams.
The high beam indicator will light when the headlight high beams are switched
on.
WARNING
Do not use the high beams when there are other vehicles approaching you. Using
high beam could obstruc ...
Hyundai Tucson (LM) 2010-2015 Service Manual: Components and Components Location
Component Location
x Button start type : Front windshield deicer, Rear glass
defogger and outside mirror heater functions are joined together one
switch.x General key type : Front windshield deicer switch is located in left air vent separately.
1. Windshield deicer relay2. Windshield ...
