Hyundai Tucson: Electro chromic Inside Rear View Mirror / Repair procedures
| Inspection |
Check it by the procedure below to see if the function of the ECM is normal.
| 1. |
Turn the ignition key to the "ON" position. |
| 2. |
Cover the forward facing sensor. |
| 3. |
Head a light to the rearward looking sensor. |
| 4. |
The ECM should be darkened as soon as the rearward looking sensor detects the light.
|

| 5. |
When the reverse gear is engaged, the ECM should not be darkened.
When heading lights to both the forward facing and rearward looking sensors, the ECM should not be darkened. |
| Removal |
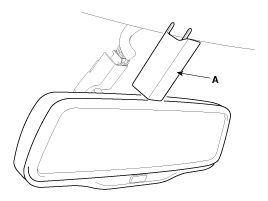
| 1. |
Remove the mirror wiring cover (A).
|
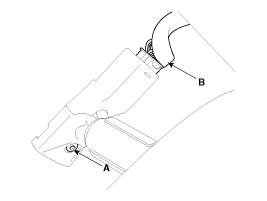
| 2. |
Remove the mirror mounting screw (A) and connector (B).
|
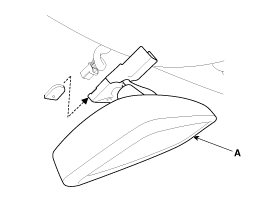
| 3. |
Remove the mirror (A) pulling up in the arrow direction.
|
| Installation |
| 1. |
Install the mirror making sure the mounting bracket not to be damaged. |
| 2. |
Install the mirror wiring cover after reconnecting the connector and tightening the screw. |
 Description and Operation
Description
The ECM (Electro Chromatic inside rear view Mirror) is for
dimming the reflecting light from a vehicle behind at night, in order
the user not to be dazzled by the light. The forward ...
 Compass Mirror Description and Operation
Description
The compass feature is designed to be integrated into an electro chromic interior rearview mirror.
The mirror assembly shall display a compass heading.
The compass mirror then take th ...
Other information:
Hyundai Tucson (LM) 2010-2015 Service Manual: ETC (Electronic Throttle Control) System Schematic Diagrams
Circuit Diagram
(M/T)
(A/T)
...
Hyundai Tucson (LM) 2010-2015 Service Manual: Passenger Airbag (PAB) Module Repair procedures
Removal
1.
Disconnect the battery negative cable and wait for at least three minutes before beginning work.
2.
Remove the glove box housing. (Refer to the Body group- crash pad).
3.
Disconnect the passenger airbag connector and remove the PAB mounting bolt.
4.
Remove the crash pad. ( ...
© 2010-2024 www.htmanual.net
