Hyundai Tucson: Smart Parking Assist System (SPAS) / Smart Parking Assist System Unit Repair procedures
Hyundai Tucson (LM) 2010-2015 Service Manual / Body Electrical System / Smart Parking Assist System (SPAS) / Smart Parking Assist System Unit Repair procedures
| Removal |
|

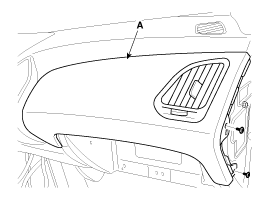
| 1. |
Using a screwdriver or remover, then remove the crash pad passenger panel (A).
(Refer to the BD group - "Crash pad")
|
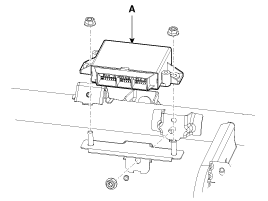
| 2. |
Remove the SPAS unit (A) after removing the nuts (2EA) and disconnecting the connectors.
|
| Installation |
| 1. |
Connect the connectors and install the SPAS unit (A). |
| 2. |
Install the crash pad passenger panel. |
| Inspection |
| 1. |
The SPAS (Smart Parking Assist System) can diagnose by using the GDS more quickly.
The SPAS communicates with the GDS and then reads the input/output value and drives the actuator. |
| 2. |
To diagnose the SPAS (Smart Parking Assist System) function, select the menu of model and SPAS. |
| 3. |
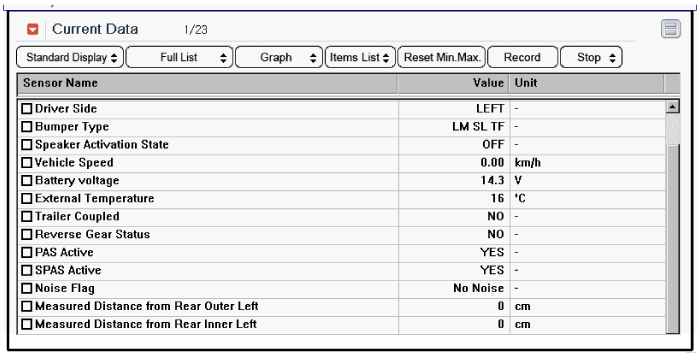
To consult the present input/output value of SPAS, "Current DATA". It provides information of SPAS input/output conditions.
|
| 4. |
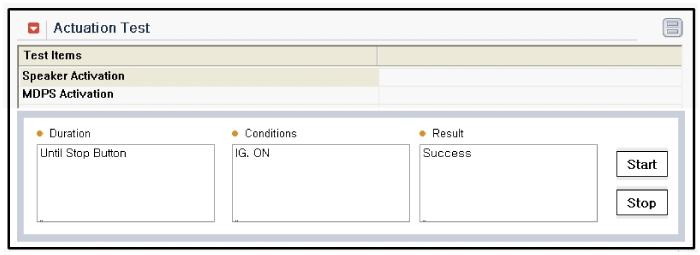
To perform compulsory operation on SPAS input factors, select "ACTUATION TEST".
|
| 5. |
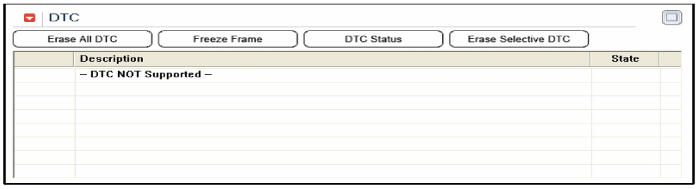
To check the DTC of the each module, select "DIAGNOSTIC TROUBLE CODES"
|
| 6. |
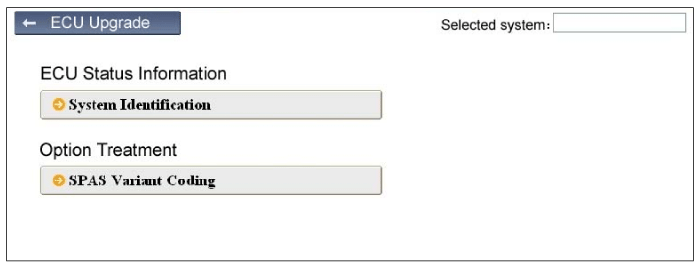
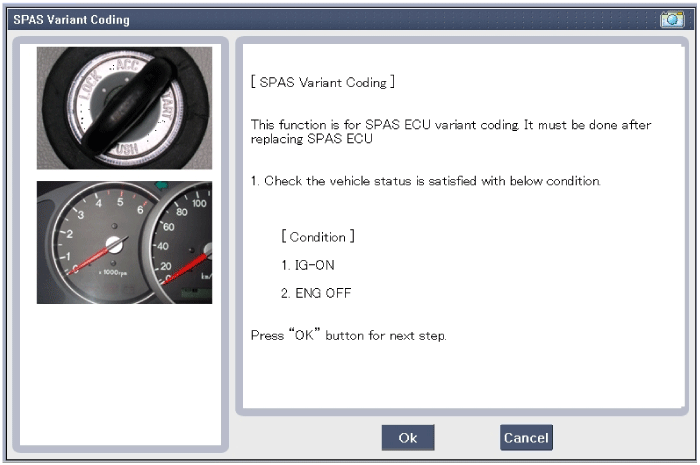
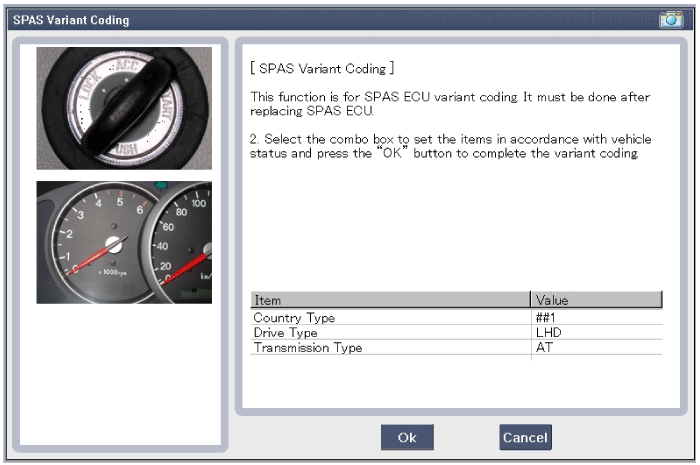
After replacing the SPAS unit, perform the "SPAS Variant Coding" procedure with GDS.
|


Other information:
Hyundai Tucson (LM) 2010-2015 Service Manual: Tail Gate Repair procedures
Replacement
Tail Gate Trim Replacement
•
When prying with a flat-tipped screwdriver, wrap it with
protective tape, and apply protective tape around the related parts, to
prevent damage.
•
Put on gloves to protect your hands.
•
Make sure the tailgat ...
Hyundai Tucson (LM) 2010-2015 Service Manual: Rheostat Repair procedures
Inspection
1.
Disconnect the negative (-) battery terminal.
2.
Remove the crash pad lower panel.
(Refer to the BD group - "Crash pad")
3.
Remove the crash pad side switch assembly (A) as shown below picture.
Put on gloves to protect your hands.
4.
Remove th ...
© 2010-2024 www.htmanual.net
