Hyundai Tucson: Interior features / Cargo security screen (if equipped)
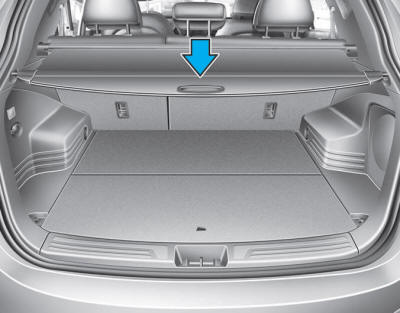
Use the cargo security screen to hide items stored in the cargo area.
To use the cargo security screen:
1. Pull the cargo security screen towards the rear of the vehicle by the handle.
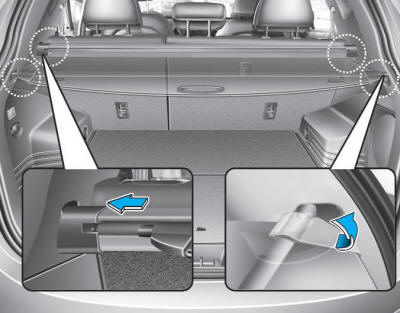
2. Insert the guide pin into the guide.
When the cargo security screen is not in use:
1. Pull the cargo security screen backward and up to release it from the guides.
2. The cargo security screen will automatically retract.
âś˝ NOTICE
The cargo security screen may not automatically retract if the screen is not fully extended. If this is the case, pull out the screen, then slowly allow it to retract.
To remove the cargo security screen:
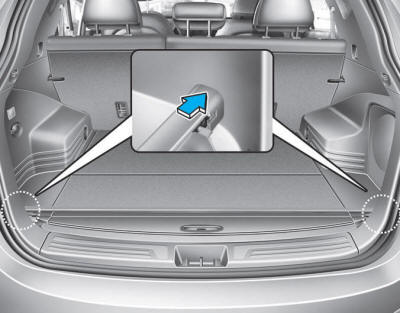
1. Push in the guide pin.
2. While pushing the guide pin, pull out the cargo security screen.
3. Open the luggage tray and keep the cargo security screen in the tray.
WARNING
- Do not place objects on the cargo security screen. Such objects may be thrown about inside the vehicle and possibly injure vehicle occupants during an accident or when braking.
- Never allow anyone to ride in the luggage compartment. It is designed for luggage only.
CAUTION
Do not place objects on the cargo security screen. It may damage the cargo security screen.
 Luggage net (if equipped)
To keep items from shifting in the cargo area, use the luggage net.
Make sure the luggage net is securely attached to the holders in the cargo area. ...
 Roof rack
If the vehicle has a roof rack, you can load cargo on top of your vehicle.
The following specification is the maximum weight that can be loaded onto the
roof rack. Distribute the load as evenly ...
Other information:
Hyundai Tucson (LM) 2010-2015 Service Manual: Roof Antenna Repair procedures
Removal
1.
Remove the rear roof trim.
(Refer to Body - "Roof Trim Assembly")
2.
Disconnect the roof antenna connectors (A) and cable (B) from the roof antenna.
3.
Remove the roof antenna (A) after removing a nut.
Installation
1.
Connect the roof antenna connectors.
2.
Install t ...
Hyundai Tucson (LM) 2010-2015 Service Manual: Quarter Fixed Glass Repair procedures
Removal
•
Put on gloves to protect your hands.
•
Take care not to body surface and other parts.
1.
Remove the following parts
A.
Rear seat assembly
(Refer to Seat & Power Seat - "Rear Seat")
B.
Rear door scuff trim
(Refer to Interior - "Interio ...
