Hyundai Tucson: Interior / Interior Trim Repair procedures
Door Scuff Trim Replacement
| • |
Put on gloves to protect your hands. |
| • |
When prying with a flat-tip screwdriver, wrap it with protective tape to prevent damage. |
| • |
Take care not to bend or scratch the trim and panels. |
|
| 1. |
Remove the door scuff trim (A).
[Front] 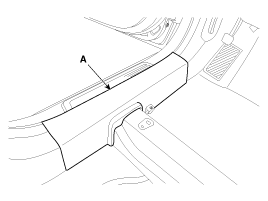
[Rear] 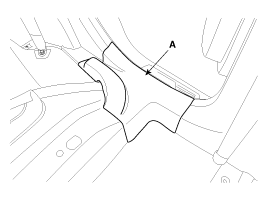
|
| 2. |
Install in the reverse order of removal.
| • |
Replace any damage clips. |
|
|
Front Pillar Trim Replacement
| • |
Put on gloves to protect your hands. |
| • |
When prying with a flat-tip screwdriver, wrap it with protective tape to prevent damage. |
| • |
Take care not to bend or scratch the trim and panels. |
|
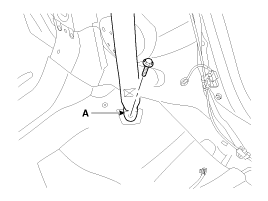
| 1. |
After loosening the mounting screw, then remove the front pillar trim (A). 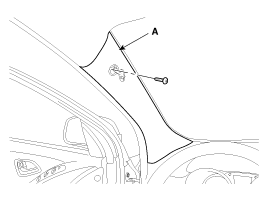
|
| 2. |
Install in the reverse order of removal.
| • |
Replace any damage clips. |
|
|
Cowl Side Trim Replacement
| • |
Put on gloves to protect your hands. |
| • |
When prying with a flat-tip screwdriver, wrap it with protective tape to prevent damage. |
| • |
Take care not to bend or scratch the trim and panels. |
|
| 1. |
Remove the front door scuff trim. |
| 2. |
Remove the hood latch release handle.
(Refer to Exterior - "Hood") |
| 3. |
Remove the cowl side trim (A). 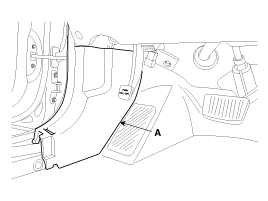
|
| 4. |
Install in the reverse order of removal.
| • |
Replace any damage clips. |
|
|
Center Piller Trim Replacement [General]
| • |
Put on gloves to protect your hands. |
| • |
When prying with a flat-tip screwdriver, wrap it with protective tape to prevent damage. |
| • |
Take care not to bend or scratch the trim and panels. |
|
| 1. |
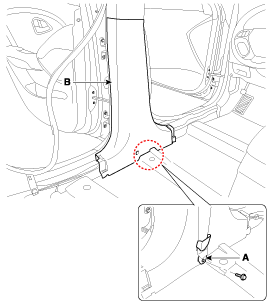
Remove the front door scuff trim and rear door scuff trim. |
| 2. |
After loosening the mounting bolt, then remove the front seat belt lower anchor (A). |
| 3. |
Remove the center lower pillar trim (B).
Tightening torque :
39.2 ~ 53.9 N.m (4.0 ~ 5.5 kgf.m, 28.9 ~ 39.8 lb-ft)
|
|
| 4. |
Remove the cap, loosen the mounting bolts. |
| 5. |
Remove the center upper pillar trim (A). 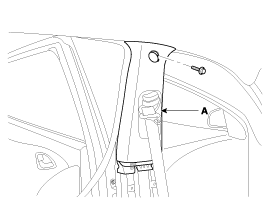
|
| 6. |
Install in the reverse order of removal.
| • |
Replace any damage clips. |
|
|
Center Piller Trim Replacement [Europe]
| • |
Put on gloves to protect your hands. |
| • |
When prying with a flat-tip screwdriver, wrap it with protective tape to prevent damage. |
| • |
Take care not to bend or scratch the trim and panels. |
|
| 1. |
Remove the front door scuff trim and rear door scuff trim. |
| 2. |
Using a screwdriver or remover (B), remove the lower anchor (A). 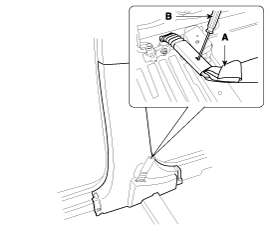
|
| 3. |
Remove the center lower pillar trim (A). 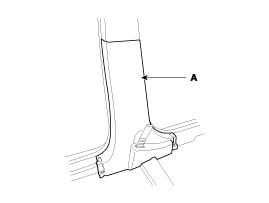
|
| 4. |
Remove the cap, loosen the mounting bolts. |
| 5. |
Remove the center upper pillar trim (A).
|
| 6. |
Install in the reverse order of removal.
| • |
Replace any damage clips. |
|
|
Rear Pillar Trim Replacement
| • |
Put on gloves to protect your hands. |
| • |
When prying with a flat-tip screwdriver, wrap it with protective tape to prevent damage. |
| • |
Take care not to bend or scratch the trim and panels. |
|
| 1. |
Remove the rear seat.
(Refer to Seat & Power Seat - "Rear seat") |
| 2. |
Remove the rear door scuff trim. |
| 3. |
Detach the clips and then remove the transverse trim (A). 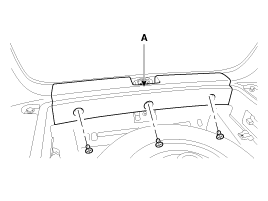
|
| 4. |
After loosening the mounting bolt, then remove the rear sent belt lower anchor (A).
Tightening torque :
39.2 ~ 53.9 N.m (4.0 ~ 5.5 kgf.m, 28.9 ~ 39.8 lb-ft )
|
|
| 5. |
After loosening the mounting bolts, then remove the rear seat bracket (A). 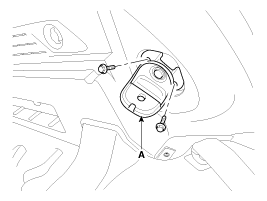
|
| 6. |
Using a screwdriver, remove the lamp (A). |
| 7. |
Disconnect the connector (B). |
| 8. |
After loosening the mounting screws, then remove the luggage side trim (C). 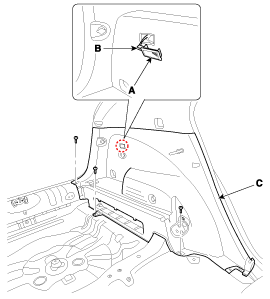
|
| 9. |
Disconnect the connector (A). 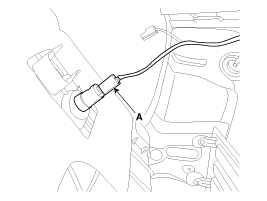
|
| 10. |
After loosening the mounting bolt and screws, then remove the rear pillar trim (A). 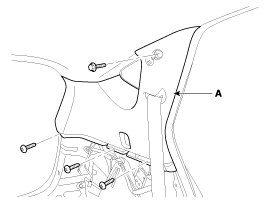
|
| 11. |
Install in the reverse order of removal.
| • |
Replace any damage clips. |
|
|
Luggage Side Trim Replacement
| • |
Put on gloves to protect your hands. |
| • |
When prying with a flat-tip screwdriver, wrap it with protective tape to prevent damage. |
| • |
Take care not to bend or scratch the trim and panels. |
|
| 1. |
Remove the rear seat.
(Refer to Seat & Power Seat - "Rear seat") |
| 2. |
Remove the transverse trim. |
| 3. |
After loosening the mounting screws, then remove the luggage side trim. |
| 4. |
Install in the reverse order of removal.
| • |
Replace any damage clips. |
|
|
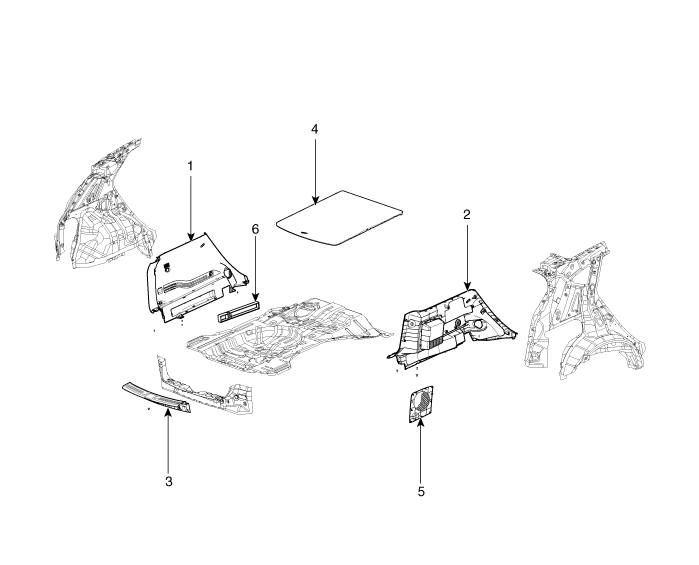
1. Luggage side trim (LH)
2. Luggage side trim (RH)
3. Transverse trim
| 4. Luggage board
5. Speaker cover trim
6. Triangle
|
Components
1. Front pillar trim2. Center upper pillar trim3. Center lower pillar trim4. Rear pillar trim5. Cargo screen6. Cowl side trim7. Front door scuff trim8. Rear door scuff trim9. Front ...
Components
1. Windshield side molding2. Windshield glass
...

 Interior Trim Components and Components Location
 Windshield Glass Components and Components Location