Hyundai Tucson: Manual Transaxle System / Manual Transaxle Repair procedures
Hyundai Tucson (LM) 2010-2015 Service Manual / Manual Transaxle System / Manual Transaxle System / Manual Transaxle Repair procedures
| Removal |
| 1. |
Remove the following items;
|
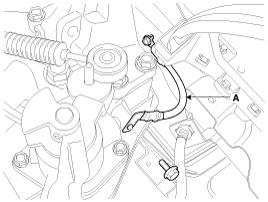
| 2. |
Disconnect the back up lamp switch connector (A).
|

| 3. |
Remove the control cable assembly (A).
|
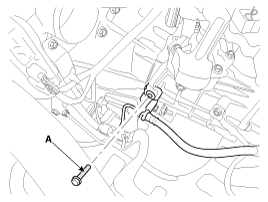
| 4. |
Remove the ground cable (A) from transaxle.
|
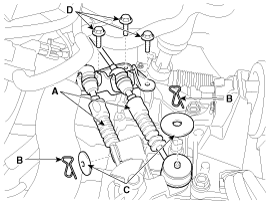
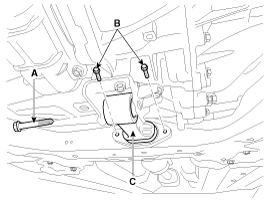
| 5. |
Remove the clutch tube bracket bolt (A).
|
| 6. |
Remove the transaxle upper mounting bolts (B-2ea) and the start motor mounting bolts (A-2ea).
|
| 7. |
Remove the cowl top cover or wiper motor.
(Refer to "Windshield Wiper/Washer" in BE group.) |
| 8. |
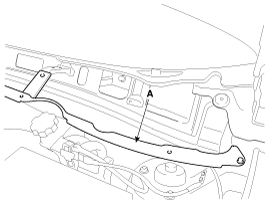
Remove the cowl complete assembly panel (A).
|
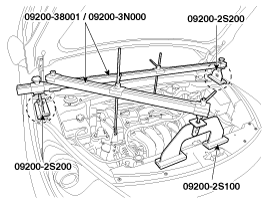
| 9. |
Using the engine support fixture (Support SST No.:
09200-2S000, Beam SST No.: 09200-38001), hold the engine and transaxle
assembly safely.
|
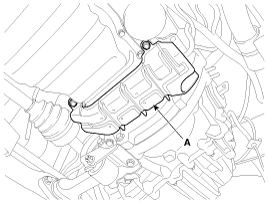
| 10. |
Remove the cover (A).
|
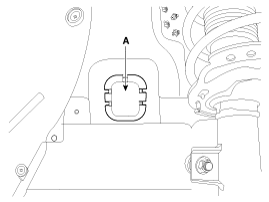
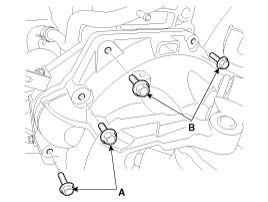
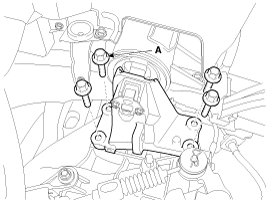
| 11. |
Remove the transaxle mounting support bracket bolt (A).
|
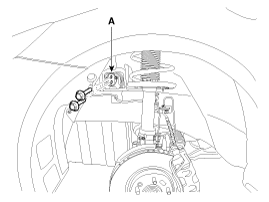
| 12. |
Remove the transaxle mounting support bracket bolt (A-4ea).
|
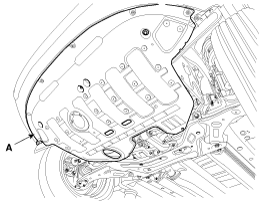
| 13. |
Remove the under cover (A).
|
| 14. |
Remove the side cover (A).
|
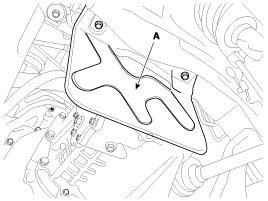
| 15. |
Remove the cover (A).
|
| 16. |
Remove the following items;
|
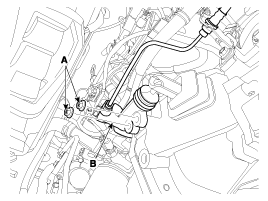
| 17. |
Remove the clutch release cylinder assembly (B) after removing the bolts (A-2ea).
|
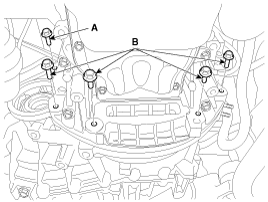
| 18. |
Remove the lower mounting bolts (A-1ea, B-4ea) of lower part
of the transaxle, and remove the transaxle assembly by supporting it
with a jack.
|
| Installation |
| 1. |
Installation is the reverse of removal.
|

 Manual Transaxle Components and Components Location
Components
1. Clutch housing2. Back-up lamp switch3. Control shaft complete 4. Manual transaxle case
...
 Back-up Lamp Switch Description and Operation
Description
Back up lamp switch is pushed by the reverse lug sliding when select arm, and switches the back up lamp.
...
Other information:
Hyundai Tucson (LM) 2010-2015 Service Manual: Engine Mounting Components and Components Location
Components
1. Engine mounting bracket2. Transaxle mounting bracket3. Roll rod bracket
...
Hyundai Tucson (LM) 2010-2015 Owners Manual: Use of compact spare tires
Compact spare tires are designed for emergency use only. Drive carefully on the
compact spare tire and always follow the safety precautions.
WARNING
To prevent compact spare tire failure and loss of control possibly resulting
in an accident:
Use the compact spare tire only in an emergency. ...
© 2010-2026 www.htmanual.net
