Hyundai Tucson: Interior / Console Repair procedures
Hyundai Tucson (LM) 2010-2015 Service Manual / Body (Interior and Exterior) / Interior / Console Repair procedures
| Replacement |
| [M/T] |
|

|

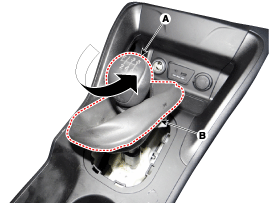
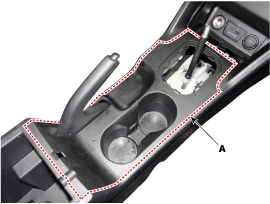
| 1. |
Using a screwdriver, remove the knob (A) and boots (B).
|
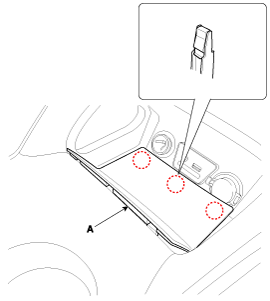
| 2. |
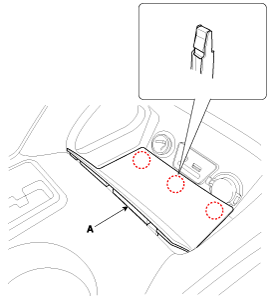
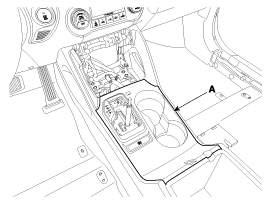
Using a screwdriver, remove the floor console tray (A).
|
| 3. |
Using a screwdriver, remove the floor console bezel (A).
|
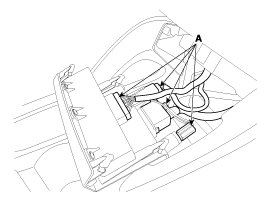
| 4. |
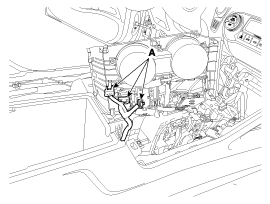
Disconnect the connectors (A).
|
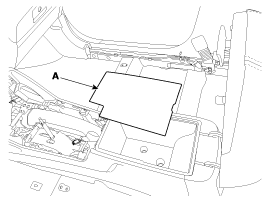
| 5. |
Using a screwdriver, remove the console upper cover (A).
|
| 6. |
Disconnect the connector (A).
|
| 7. |
Remove the console tray mat (A).
|
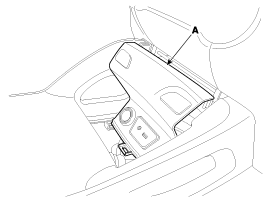
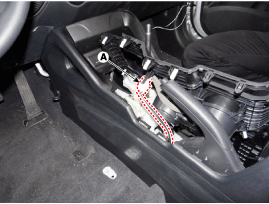
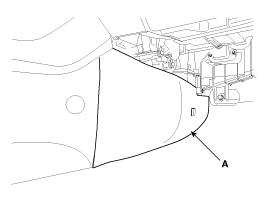
| 8. |
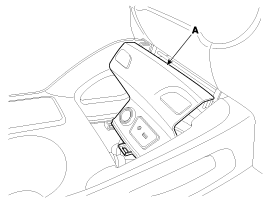
Remove the extension side cover (A).
|
| 9. |
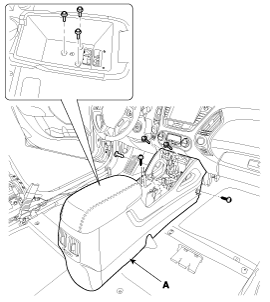
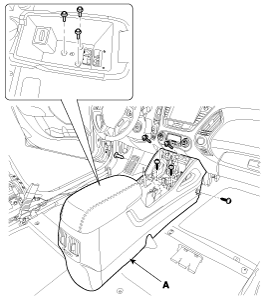
After loosening the mounting bolts and screws, then remove the floor console assembly (A).
|
| [A/T] |
|
|
| 1. |
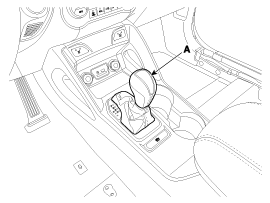
Remove the knob (A).
|
| 2. |
Using a screwdriver, remove the floor console tray (A).
|
| 3. |
Using a screwdriver, remove the floor console bezel (A).
|
| 4. |
Disconnect the connectors (A).
|
| 5. |
Using a screwdriver, remove the console upper cover (A).
|
| 6. |
Disconnect the connector (A).
|
| 7. |
Remove the console armrest tray (A).
|

| 8. |
Remove the console tray mat (A).
|

| 9. |
Remove the extension side cover (A).
|
| 10. |
After loosening the mounting bolts and screws, then remove the floor console assembly (A).
|
| 11. |
Install in the reverse order of removal.
|
 Console Components and Components Location
Components
[A/T]
1. Floor console2. Console upper cover (AT)3. Floor console tray4. Floor console bezel5. Extension side cover
...
 Crash Pad Components and Components Location
Components
1. Main crash pad assembly2. Center fascia upper panel3. Cluster fascia panel4. Cluster fascia lower panel5. Crash pad side cover6. Shrouds upper panel 7. Shrouds lower panel 8. Air ve ...
Other information:
Hyundai Tucson (LM) 2010-2015 Service Manual: Condenser Repair procedures
Inspection
1.
Check the condenser fins for clogging and damage. If clogged,
clean them with water, and blow them with compressed air. If bent,
gently bend them using a screwdriver or pliers.
2.
Check the condenser connections for leakage, and repair or replace it, if required.
Replace ...
Hyundai Tucson (LM) 2010-2015 Service Manual: TPMS Receiver Repair procedures
Replacement
When the receiver first arrives for replacement:
1)
It will be in Virgin State.
2)
It will not be configured for any specific platform.
3)
It will not have any sensor ID's memorized.
It is important to make sure that the corre ...
© 2010-2026 www.htmanual.net
