Hyundai Tucson: Front Suspension System / Front Strut Assembly Repair procedures
Hyundai Tucson (LM) 2010-2015 Service Manual / Suspension System / Front Suspension System / Front Strut Assembly Repair procedures
| Replacement |
| 1. |
Remove the front wheel & tire.
|
| 2. |
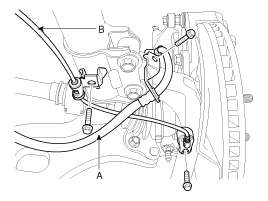
Remove the brake hose (A) & wheel speed sensor bracket (B) from the front strut assembly by loosening mounting bolts.
|
| 3. |
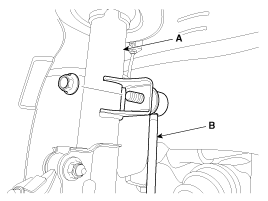
Disconnect the stabilizer link (B) with the front strut assembly (A) after loosening the nut.
|
| 4. |
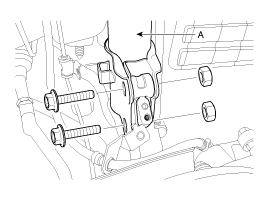
Disconnect the front strut assembly (A) with the knuckle by loosening the bolt & nut.
|
| 5. |
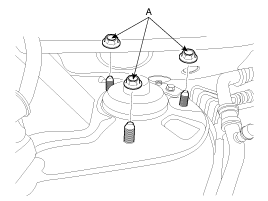
Remove the front strut assembly and than loosen the strut mounting nuts (A).
|
| 6. |
Installation is the reverse of removal. |
| Disassembly |
| 1. |
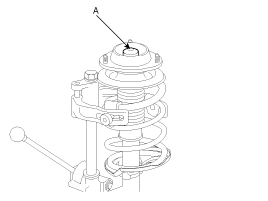
Remove the dust cover (A).
|
| 2. |
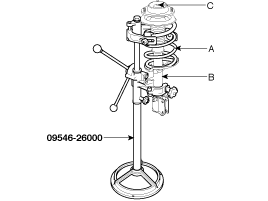
Using the special tool (09546-26000), compress the coil spring (A).
|
| 3. |
Remove the self-locking nut (C) from the strut assembly (B). |
| 4. |
Remove the insulator, spring seat, coil spring and dust cover from the strut assembly. |
| 5. |
Reassembly is the reverse of the disassembly. |
| Inspection |
| 1. |
Check the strut bearing for wear and damage. |
| 2. |
Check the spring upper and lower seat for damage and deterioration. |
| 3. |
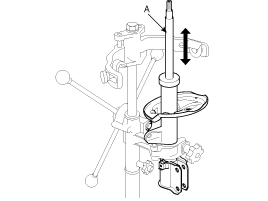
Compress and extend the piston rod (A) and check that there is no abnormal resistance or unusual sound during operation.
|
Disposal
| 1. |
Fully extend the piston rod. |
| 2. |
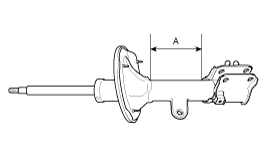
Drill a hole on the A section to remove gas from the cylinder.
|
 Front Strut Assembly Components and Components Location
Components
1. Dust cover2. Upper mounting nut3. Self locking nut4. Insulator5. Spring upper pad6. Strut dust cover & Bumper rubber7. Coil spring8. Spring lower pad9. Piston rod10. Strut asse ...
 Front Lower Arm Repair procedures
Removal
1.
Remove the front wheel & tire.
Tightening torque :
88.25 ~ 117.68 N.m (9.0 ~ 12.0 kgf.m, 65.1 ~ 86.8 lb-ft)
Be careful not to damage to the hub bolts w ...
Other information:
Hyundai Tucson (LM) 2010-2015 Service Manual: Input Speed Sensor Troubleshooting
Signal Waveform
Fig 1) Input/Output speed sensor at low speed
Fig 2) Input/Output speed sensor at high speed ...
Hyundai Tucson (LM) 2010-2015 Owners Manual: Tire replacement
If the tire is worn evenly, a tread wear indicator will appear as a solid band
across the tread. This shows there is less than 1/16 inch (1.6 mm) of tread left
on the tire. Replace the tire when this happens.
Do not wait for the band to appear across the entire tread before replacing the
ti ...
В© 2010-2026 www.htmanual.net


