Hyundai Tucson: Controller / Heater & A/C Control Unit(Dual) Repair procedures
Hyundai Tucson (LM) 2010-2015 Service Manual / Heating, Ventilation and Air Conditioning / Controller / Heater & A/C Control Unit(Dual) Repair procedures
| Self Diagnosis |
| 1. |
Self-diagnosis process
|
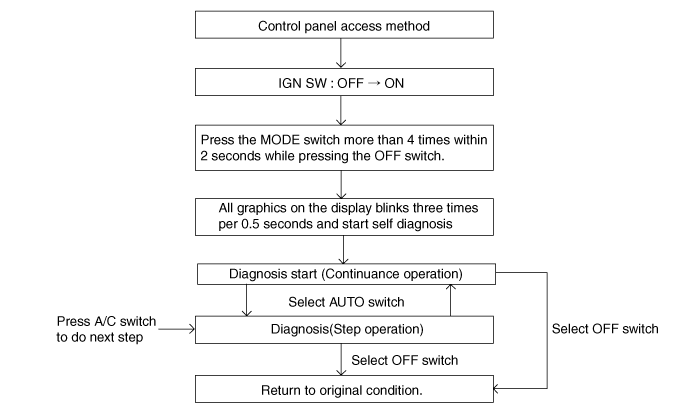
| 2. |
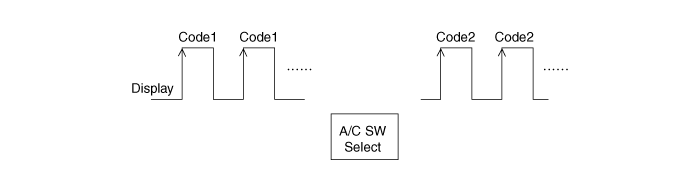
How to read self-diagnostic code
After the display panel flickers three times every 0.5
second, the corresponding fault code flickers on the setup temperature
display panel every 0.5 second and will show two figures. Codes are
displayed in numerical format
Fault Code
|
| 3. |
Fault code display
|


| 4. |
If fault codes are displayed during the check, Inspect malfunction causes by referring to fault codes. |
| 5. |
Fail safe
|
| Replacement |
| 1. |
Disconnect the negative (-) battery terminal. |
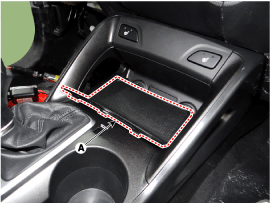
| 2. |
Remove the under cover (A).
|
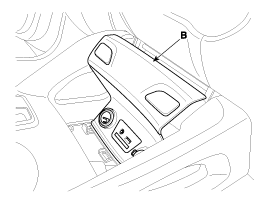
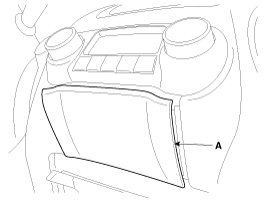
| 3. |
Remove the console upper cover (B).
|
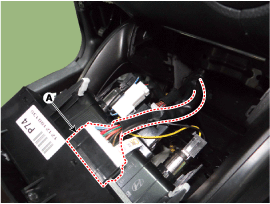
| 4. |
Remove the connectors (A).
|
| 5. |
Using the screwdriver, remove the center facia lower cover (A).
|
| 6. |
Using the screwdriver, remove the center facia lower switch assembly (A).
|
| 7. |
Disconnect the connectors and then remove the center facia lower switch assembly (A).
|
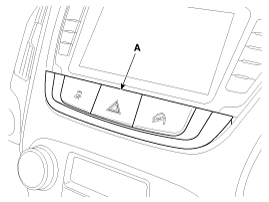
| 8. |
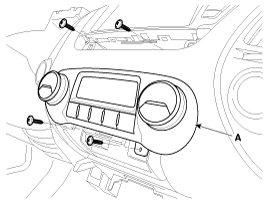
Loosen the control panel mounting screws and then remove the control panel (A).
|
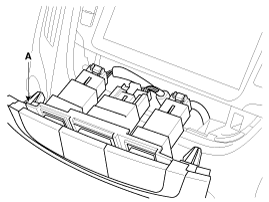
| 9. |
Disconnect the connectors (A).
|

| 10. |
Install in the reverse order of removal. |
 Heater & A/C Control Unit(Dual) Components and Components Location
Components
Control Panel
Connector Pin Function
ConnectorPin NOFunctionConnectorPin NOFunctionConnector(A)1BatteryConnector(B)1CAN (LOW)2Tail Lamp (ILL+)2CAN (HIGH)3IG23Intake Actuator (F/B)4DR ...
Other information:
Hyundai Tucson (LM) 2010-2015 Owners Manual: Rear seat headrest
The rear seats are equipped with headrests in all the seating positions for the
passenger’s safety and comfort.
Adjusting the height up and down
To raise the headrest:
1. Pull it up to the desired position (1).
To lower the headrest:
1. Push and hold the release button (2) on the he ...
Hyundai Tucson (LM) 2010-2015 Service Manual: Schematic Diagrams
Schematic Diagram
Canister
The Canister is filled with charcoal and absorbs evaporated
fuel vapor from the fuel tank. The gathered fuel vapor in canister is
drawn into the intake manifold by the ECM/PCM when appropriate
conditions are set.
Purge Control Solenoid Valve (PCSV)
The Purge ...
© 2010-2026 www.htmanual.net
