Hyundai Tucson: AVN System / Speakers Repair procedures
| Inspection |
| 1. |
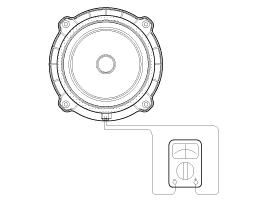
Troubleshooting for Speaker
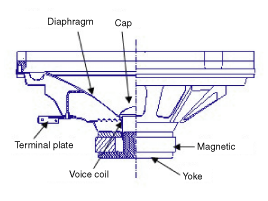
| ||||||||||||||||||||||||||||||||||||||


| Removal |
| 1. |
Remove the front door trim.
(Refer to the BD group - "Front door") |
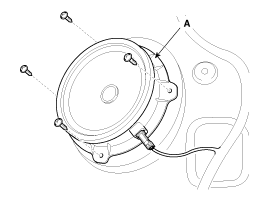
| 2. |
Remove the front speaker (A) after removing 4 screws.
|
| 1. |
Remove the rear door trim.
(Refer to the BD group - "Rear door") |
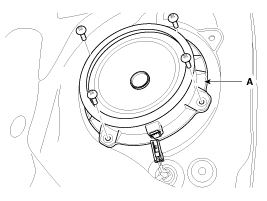
| 2. |
Remove the rear speaker (A) after removing 4 rivets.
|
| 1. |
Remove the front door delta cover (A).
|

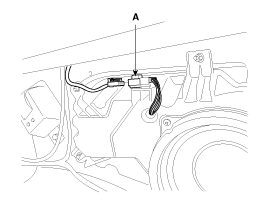
| 2. |
Remove the tweeter speaker after disconnecting the connector (A).
|

| 1. |
Remove the right luggage side trim.
(Refer to the BD group – "Interior trim") |
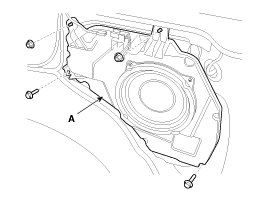
| 2. |
Remove the woofer speaker connector (A).
|
| 3. |
Remove the woofer speaker (A) after removing screws (2EA) and nuts (2EA).
|
| Installation |
| 1. |
Install the speaker to the speaker mounting hole in the door in-panel. |
| 2. |
Reconnect the speaker connector. |
| 1. |
Install the speaker to the speaker mounting hole in the door in-panel. |
| 2. |
Reconnect the speaker connector. |
| 1. |
Install the front tweeter speaker to the front door delta cover. |
| 2. |
Reconnect the connector and then install the delta cover. |
| 1. |
Install the woofer speaker to the left quarter inner panel. |
| 2. |
Reconnect the connector |
| 3. |
Install the right luggage side trim. |
 Multimedia Jack Repair procedures
Removal
1.
Remove the floor console upper cover (A) using the appropriate tool.
2.
Remove the seat heater switch module (A).
Take care not to damage the hook when removi ...
 External Amplifier Components and Components Location
Components
Connector Pin Information
No.Connector A (26 pin)Connector B (16 pin)Connector C (12 pin)1Battery +Right surround speaker +Rear right door +2Battery +Left surround speaker +Rear left do ...
Other information:
Hyundai Tucson (LM) 2010-2015 Service Manual: Special Service Tools
Special Service Tools
Tools(Number and name)IllustrationUse09200-3N000Engine support fixture(Beam)Removal and installation of the transaxle.Use this beam (SST No. : 09200-38001/09200-3N000) with the supporter (SST No. : 09200-2S000).09200-2S000Engine support fixture(Adapter)Removal and installa ...
Hyundai Tucson (LM) 2010-2015 Owners Manual: Front fog light (if equipped)
Fog lights are used to provide improved visibility when conditions are poor due
to fog, rain, snow, etc.
Use the switch next to the headlight switch to turn the Fog Lights ON and OFF.
The fog lights will turn on when fog light switch (1) is turned to ON after the
head-lights are turned on ...
