Hyundai Tucson: Tire Pressure Monitoring System / TPMS Sensor Repair procedures
Hyundai Tucson (LM) 2010-2015 Service Manual / Suspension System / Tire Pressure Monitoring System / TPMS Sensor Repair procedures
| Removal |
Tire Removal
| 1. |
Deflate tire & remove balance weights.
|


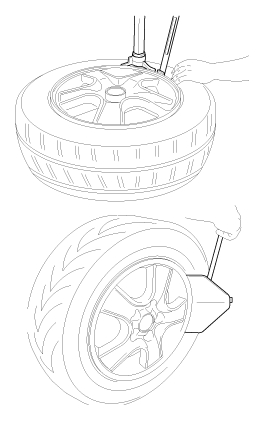
Sensor Removal
Handle the sensor with care. |
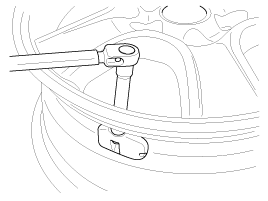
| 1. |
Remove the valve nut.
|
| 2. |
Discard the valve assembly. |
| Installation |
Sensor Fit
|
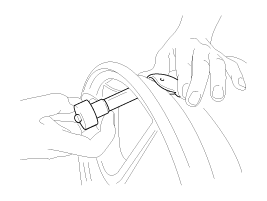
| 1. |
Slide the sensor-valve unit through the valve hole of the
rim. Hold the sensor against the rim and the rubber grommet against the
sealing surface. |
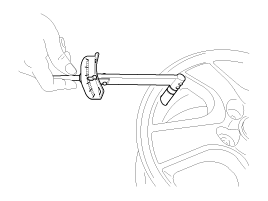
| 2. |
Insert the nut over the valve stem and then tighten the nut.
|
| 3. |
Continue to tightening the nut until contact with the rim and then tighten to 3.5 ~ 4.5Nm.
|
| 4. |
Check that the sensor is firmly attached to the rim.
|
| Adjustment |
| Diagnosis procedure by using diagnostic device |
As manual for diagnosis methods by using diagnosis device, the main contents are as follows:
| 1. |
Connect self-diagnosis connector(16pins) located in the lower
of driver side crash pad to self-diagnosis device, and then turn the
self-diagnosis device after key is ON. |
| 2. |
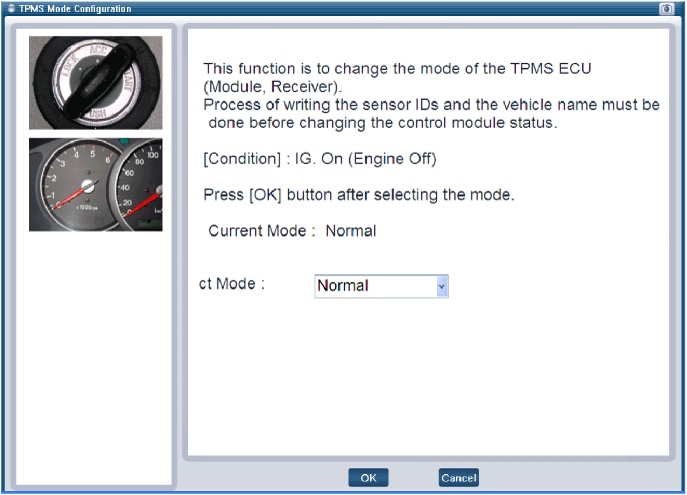
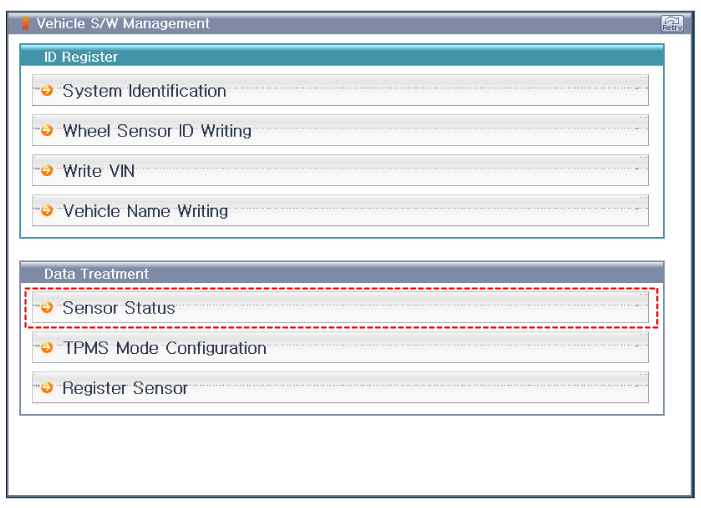
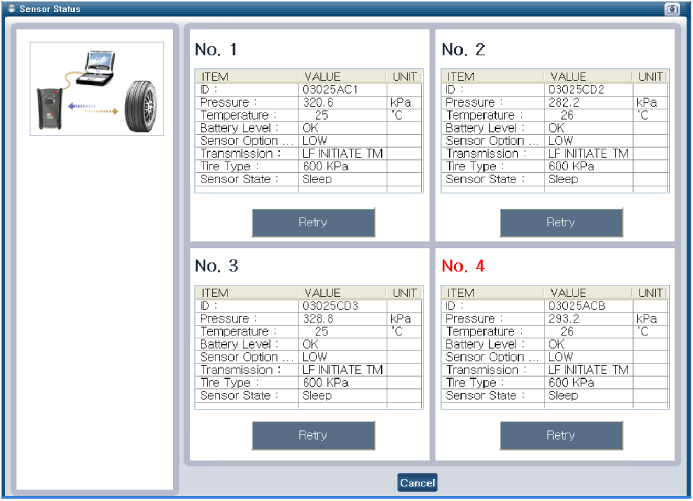
Select the "vehicle model" and "TPMS" on GDS vehicle selection screen, then select OK.
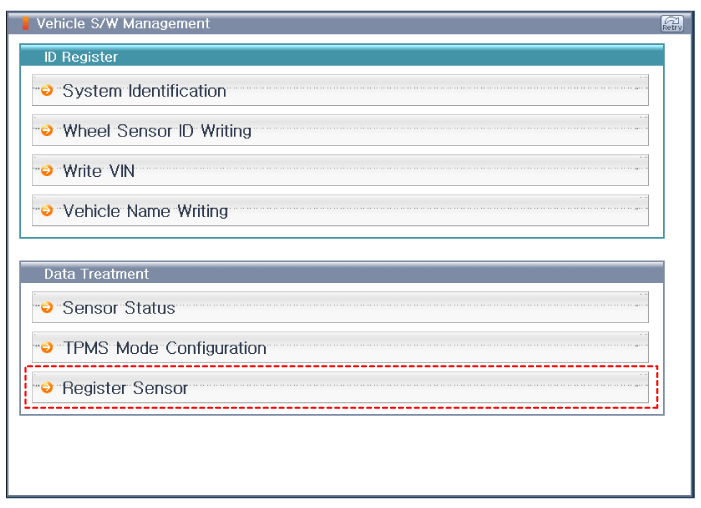
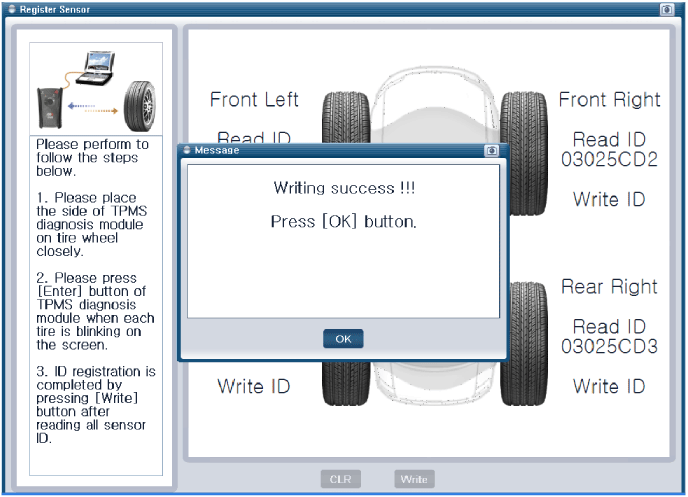
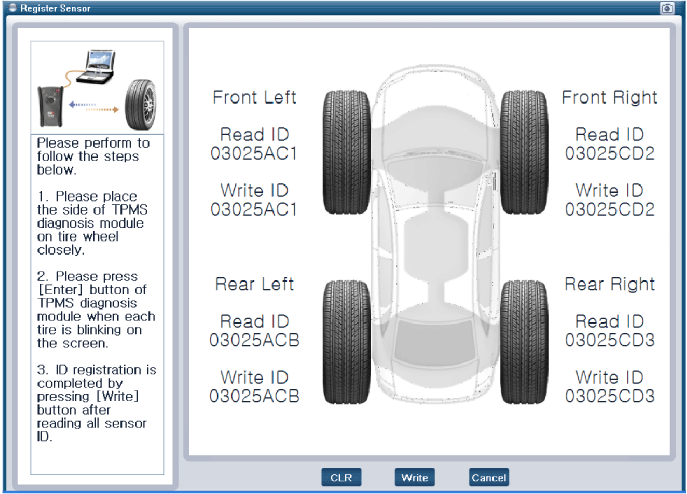
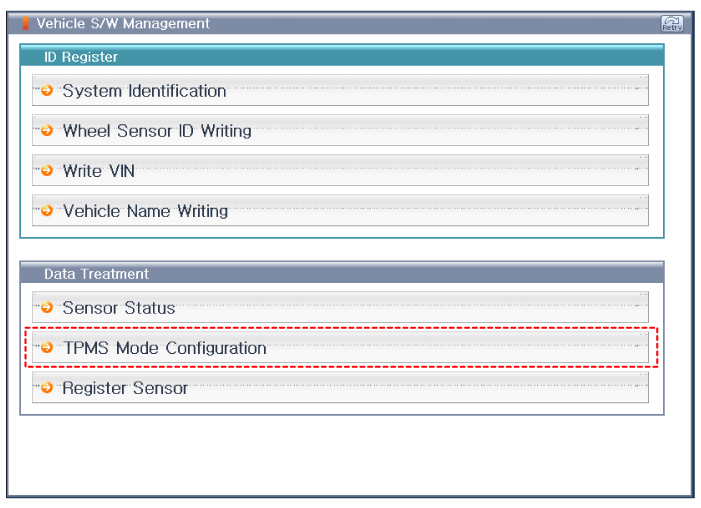
[Register Sensor initialization]
[TPMS Mode Confiquration]
[Sensor Status initialization]
|
 TPMS Sensor Description and Operation
Description
1.
Mode
(1)
Configuration State
A.
All sensors should be in the Low Line (Base) state.
B.
In Low Line (Base) configuration, sensor transmissions occur
every 3 minutes 20 seco ...
 TPMS Receiver Description and Operation
Description
1.
Mode
(1)
Virgin State
A.
The receiver as a sole part is shipped in this state. Replacement parts should therefore arrive in this state.
B.
In this state, there is no sensor ...
Other information:
Hyundai Tucson (LM) 2010-2015 Owners Manual: Standard programming
To train most devices, follow these instructions:
1. For first-time programming, press and hold the two outside buttons, HomeLink®
Channel 1 and Channel 3 Buttons, until the indicator light begins to flash (after
20 seconds).
Release both buttons. Do not hold the buttons for longer than 30 se ...
Hyundai Tucson (LM) 2010-2015 Service Manual: Input Speed Sensor Troubleshooting
Signal Waveform
Fig 1) Input/Output speed sensor at low speed
Fig 2) Input/Output speed sensor at high speed ...
┬® 2010-2026 www.htmanual.net
