Hyundai Tucson: Transfer Assembly / Oil Seal Repair procedures
Hyundai Tucson (LM) 2010-2015 Service Manual / 4 Wheel Drive (4WD) System / Transfer Assembly / Oil Seal Repair procedures
| Replacement |
[Right side]
| 1. |
Remove the driveshaft assembly. (RH side)
(Refer to Driveshaft and axle - "Front Driveshaft ") |
| 2. |
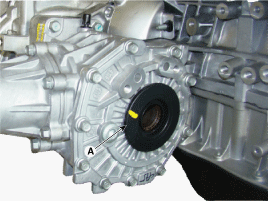
Remove the dust cover (A).
|
| 3. |
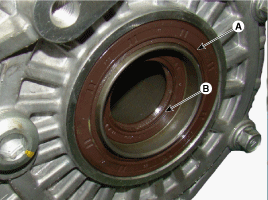
Remove the oil seal (A, B).
|
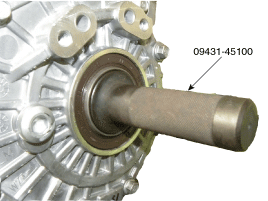
| 4. |
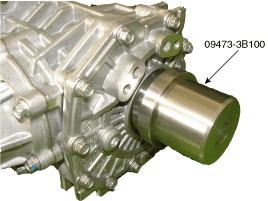
Install the oil seal with special service tools.
|

| 5. |
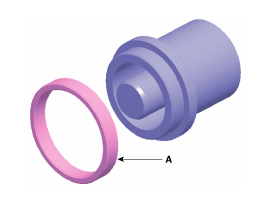
Install the new dust cover (A).
|
| 6. |
Add to transfer fluid.
(Refer to 4 Wheel Drive System - "Transfer Fluid") |
| 7. |
Install the drive shaft assembly. (RH side)
(Refer to Driveshaft and axle - "Front Driveshaft ") |
| 8. |
Install the front muffler. (Only gasoline 3.0 / 3.3)
G 3.0 GDI (Refer to Engine Mechanical System - " Front Muffler ")
G 3.3 MPI (Refer to Engine Mechanical System - " Front Muffler ")
|
[Left side]
| 1. |
Remove the transfer assembly from the transaxle assembly.
(Refer to Transfer Assembyl - "Front Wheel Transfer Assembly") |
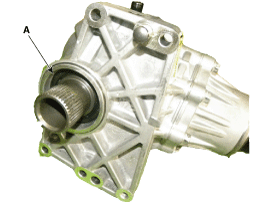
| 2. |
Remove the oil seal (A).
|
| 3. |
Install the oil seal with special service tools.
|
| 4. |
Add to transfer fluid.
(Refer to 4 Wheel Drive System - "Transfer Fluid") |
| 5. |
Install the transfer assembly.
(Refer to 4 Wheel Drive System - "Front Wheel Transfer Assembly") |
 Front Wheel Transfer Assembly Repair procedures
Removal
1.
Remove the following items;
A.
Sub frame assembly
(Refer to Suspension System - "Sub Frame")
B.
Drive shaft assembly.
(Refer to Driveshaft and axle - "Front Driveshaft ")
...

Other information:
Hyundai Tucson (LM) 2010-2015 Service Manual: Heated Steering wheel Description and Operation
Description
Heated pads to grip the steering grip makes the fever.
1.
Heated control unit
2.
Heated pad
Specifications
ItemSpecificationVoltage13.5 VHeated pad resistance1.4 ~ 1.8 x ± 10%NTC resistance10.0 kx ± 10% (25°C)
...
Hyundai Tucson (LM) 2010-2015 Service Manual: Muffler Components and Components Location
Components
1. Front muffler2. Catalytic converter & center muffler assembly3. Main muffler4. Gasket5. Hanger
...
© 2010-2026 www.htmanual.net
