Hyundai Tucson: Seat & Power Seat / Rear Seat Repair procedures
Hyundai Tucson (LM) 2010-2015 Service Manual / Body (Interior and Exterior) / Seat & Power Seat / Rear Seat Repair procedures
| Replacement |
Seat Assembly Replacement
| 1. |
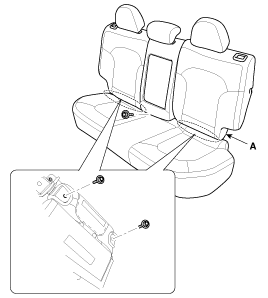
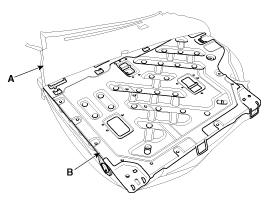
After loosening the mounting bolts, then remove the rear seat back assembly (A).
|
| 2. |
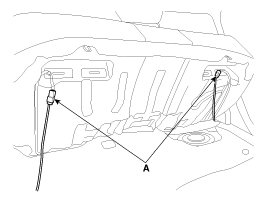
Disconnect the coonnector (A).
|
| 3. |
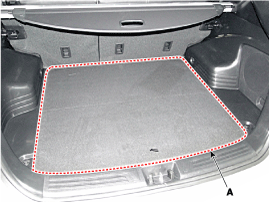
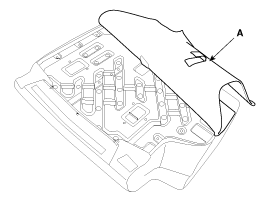
Remove the luggage covering met (A).
|
| 4. |
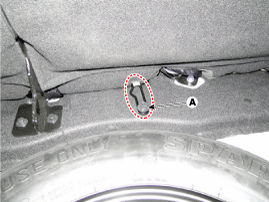
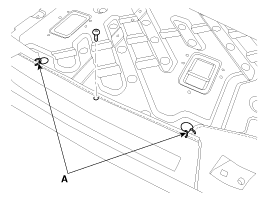
After loosening the mounting bolt (A), then remove the rear seat cushion assembly.
|
| 5. |
Install in the reverse order of removal.
|
Seat Back Cover Replacement [RH]
| 1. |
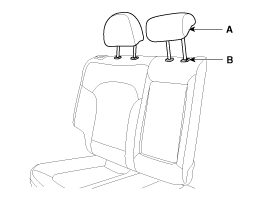
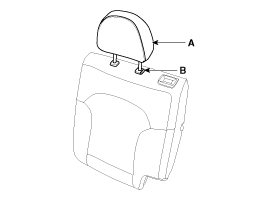
Push the lock pin (B), and then remove the headrest (A).
|
| 2. |
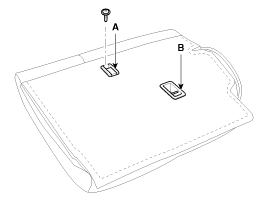
After loosening the mounting screw, then remove the rear bag hook (A). |
| 3. |
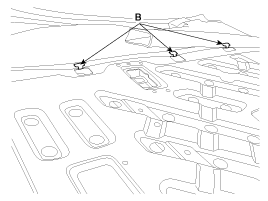
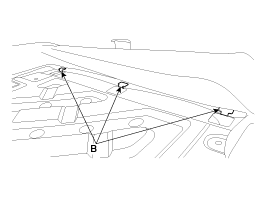
Using a screwdriver or remover, remove the tether anchor garnish (B).
|
| 4. |
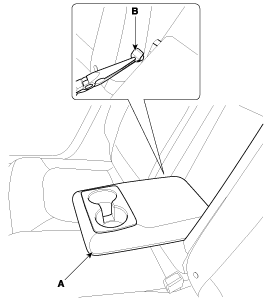
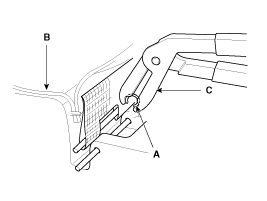
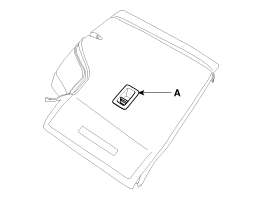
Using a long nose, remove the rock pin (B) and armrest (A).
|
| 5. |
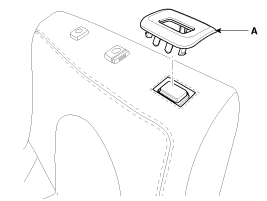
Using a screwdriver or remover, remove the upper bezel (A).
|
| 6. |
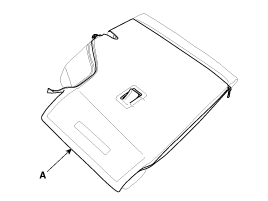
Zip off the seat back cover (A), and then full it up.
|
| 7. |
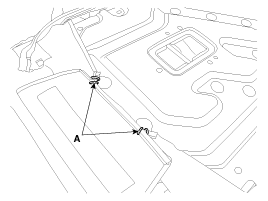
Remove the hogring clips (A) and screw.
|
| 8. |
Disonnect the hook (B).
|
| 9. |
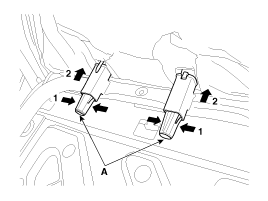
Pull out the headrest guides (A) while pinching the end of the guides, and remove them.
|
| 10. |
Disconnect the seat back cover (A) from the seat back frame (B).
|
| 11. |
Disconnect the hogring clips (B) on the front of seat back, remove the seat back cover (A).
|
| 12. |
Install in the reverse order of removal.
|
Seat Cushion Cover Replacement
| 1. |
Remove the seat back cushion cover. |
| 2. |
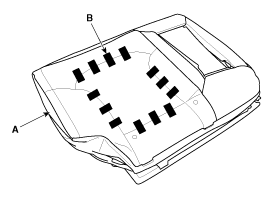
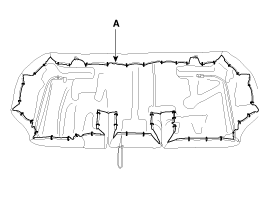
Pull out the hogring clips on the front of seat cushion, remove the seat cushion cover (A).
|
| 3. |
Install in the reverse order of removal.
|
Seat Back Cover Replacement [LH]
| 1. |
Push the lock pin (B), and then remove then headrest (A).
|
| 2. |
Using a screwdriver or remover, remove the tether anchor garnish (A).
|
| 3. |
zip off the seat back cover (A), and then full it up.
|
| 4. |
Remove the hogring clips (A).
|
| 5. |
Disonnect the hook (B).
|
| 6. |
Pull out the headrest guides (A) while pinching the end of the guides, and remove them.
|
| 7. |
Disconnect the seat back cover from the seat back frame. |
| 8. |
Disconnect the hogring clips (B) on the front of seat back, remove the seat back cover (A).
|
| 9. |
Install in the reverse order of removal.
|
 Rear Seat Components and Components Location
Components
1. Headrest2. Headrest guide3. Upper bezel4. Tether anchor garnish5. Armrest cover6. Seat back cover7. Armrest8. Seat cushion cover9. Seat warmer10. Seat cushion pad
...
 Seat Belt
...
Other information:
Hyundai Tucson (LM) 2010-2015 Service Manual: Manual Transaxle Components and Components Location
Components
1. Clutch housing2. Back-up lamp switch3. Control shaft complete 4. Manual transaxle case
...
Hyundai Tucson (LM) 2010-2015 Service Manual: Seat Belt Buckle Switch (BS) Repair procedures
Removal
1.
Disconnect the battery negative cable, and wait for at least three minutes before beginning work.
2.
Remove the front seat assembly. (Refer to the Body group- Front seat)
3.
Loosen the seat belt buckle mounting bolt and remove the seat belt buckle switch.
Installation
...
© 2010-2026 www.htmanual.net

