Hyundai Tucson: General Information / Special Service Tools
| Special Service Tools |
| Tool (Number and name) | Illustration | Use | ||||
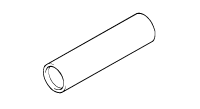
| Crankshaft front oil seal installer (09231-2E000) |
| Installation of the front oil seal 09231-2E000 (installer) | ||||
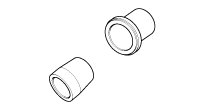
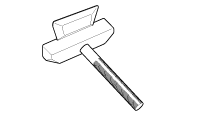
| Valve stem seal installer (09222-2E000) |
| Installation of the valve stem oil seal | ||||
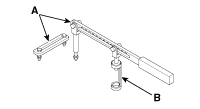
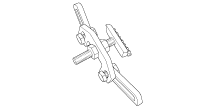
| Valve spring compressor (09222-3K000) (09222-3K100) |
| Removal and installation of the intake or exhaust valve A : 09222-3K000 (compressor) B : 09222-3K100 (holder) | ||||
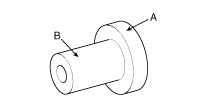
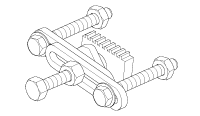
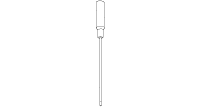
| Crankshaft rear oil seal installer (09214-2E000) (09231-H1100) |
| Installation of the rear oil seal A : 09214-2E000 (installer) B : 09231-H1100 (handle) | ||||
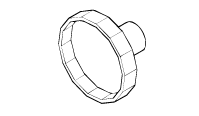
| Ring gear stopper (09231-2B100) |
| Holding ring gear so that engine doesn't turn/move after the starter is removed | ||||
| Ring gear stopper (09231-3D100) |
| Holding ring gear so that engine doesn't turn/move after the service cover is removed | ||||
| Torque angle adapter (09221-4A000) |
| Installation of bolts & nuts needing an angular method of adjustment | ||||
| Oil pan remover (09215-3C000) |
|
| ||||
| Tensioner stopper pin (09240-2E100) |
| Holding compressed piston of tensioner | ||||
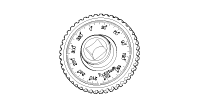
| Oil filter wrench (09263-2E000) |
| Remove and installation of oilfilter. | ||||
 Troubleshooting
Troubleshooting
SymptionSuspect areaRemedyEngine misfire with abnormal internal lower engine noises
•
Worn crankshaft bearings
•
Loose or out of specification engine flywheel
†...

Other information:
Hyundai Tucson (LM) 2010-2015 Owners Manual: Air bag non-inflation conditions
In certain low-speed collisions the air bags may not deploy. The air bags are
designed not to deploy in such cases because they may not provide benefits beyond
the protection of the seat belts.
Front air bags are not designed to inflate in rear collisions, because occupants
are moved ...
Hyundai Tucson (LM) 2010-2015 Service Manual: Underdrive Brake Control Solenoid Valve(UD/B_VFS) Repair procedures
Inspection
1.
Turn ignition switch OFF.
2.
Disconnect the solenoid valve connector.
3.
Measure resistance between sensor signal terminal and sensor ground terminal.
4.
Check that the resistance is within the specification.
Removal
Replacing an on/off soleno ...
