Hyundai Tucson: Driveshaft Assembly / Front Driveshaft Repair procedures
Hyundai Tucson (LM) 2010-2015 Service Manual / Driveshaft and axle / Driveshaft Assembly / Front Driveshaft Repair procedures
| Removal |
| 1. |
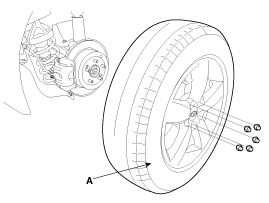
Remove the front wheel and tire (A) from front hub .
|

| 2. |
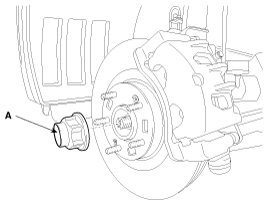
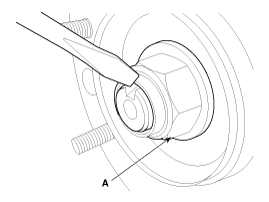
Remove the coking nut (A).
|
| 3. |
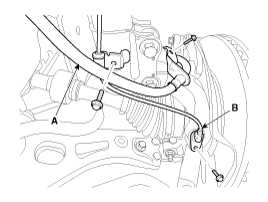
Remove the brake hose (A) and wheel speed sensor (B).
|
| 4. |
Remove the tie rod end ball joint (C) from the knuckle.
|
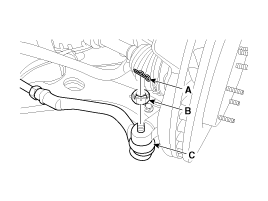
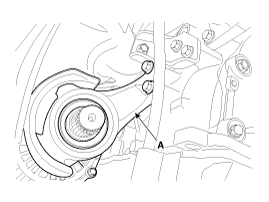
| 5. |
Remove the lower arm (A) mounting bolt and nut from the knuckle.
|
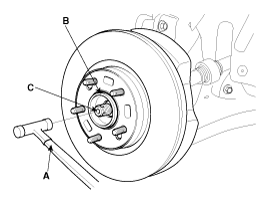
| 6. |
Using a plastic hammer (A), disconnect driveshaft (C) from the axle hub (B).
|
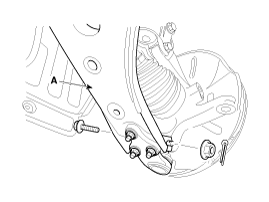
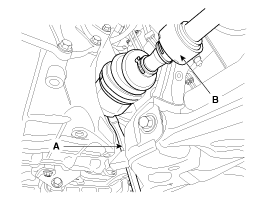
| 7. |
Loosen the inner shaft mounting bolts and then disconnect the inner shaft (A).
|

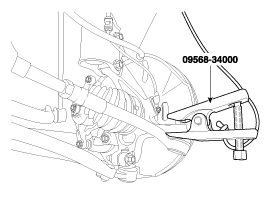
| 8. |
Insert a pry bar (A) between the transaxle case and joint case, and separate the drive shaft (B) from the transaxle case.
|
| 9. |
Install in the reverse order of removal.
|
| 10. |
Check the front alignment.
(Refer to Suspension System - "Front Alignment") |
 Front Driveshaft Components and Components Location
Components
[THETA II 2.4 2WD]
1. Driveshaft (LH)2. Driveshaft (RH)
[NU 2.0 / THETA II 2.4 4WD]
1. Driveshaft (LH)2. Inner shaft bearing bracket3. Driveshaft (RH)
Components
[LH]
...
 TJ Joint Components and Components Location
Components
[LH]
1. BJ assembly 2. BJ circlip 3. BJ boot band 4. BJ boot 5. Shaft6. TJ boot band7. TJ boot8. Spider assembly9. Retainer ring10. TJ housing11. Housing circlip
[RH]
1. BJ ...
Other information:
Hyundai Tucson (LM) 2010-2015 Service Manual: Muffler Components and Components Location
Components
1. Front muffler2. Catalytic converter & center muffler assembly3. Main muffler4. Gasket5. Hanger
...
Hyundai Tucson (LM) 2010-2015 Service Manual: Rear Coil Spring Repair procedures
Removal
1.
Remove the rear wheel & tire.
Tightening torque :
88.3 ~ 107.9 N.m (9.0 ~ 11.0 kgf.m, 65.1 ~ 79.6 lb-ft)
Be careful not to damage to the hub bolts when removing the rear wheel and tire (A).
2.
Support the rear lower arm (A) with a jack as shown i ...
© 2010-2026 www.htmanual.net
