Hyundai Tucson: Headrest / Front seat headrest
The driver’s and front passenger’s seats are equipped with adjustable headrests for the passengers safety and comfort.
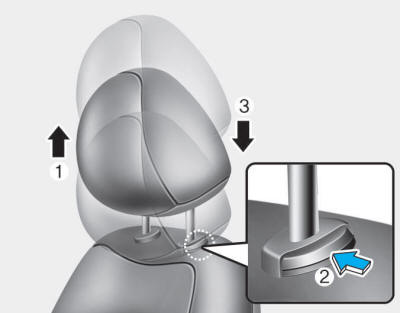
Adjusting the height up and down
To raise the headrest:
1. Pull it up to the desired position (1).
To lower the headrest:
1. Push and hold the release button (2) on the headrest support.
2. Lower the headrest to the desired position (3).
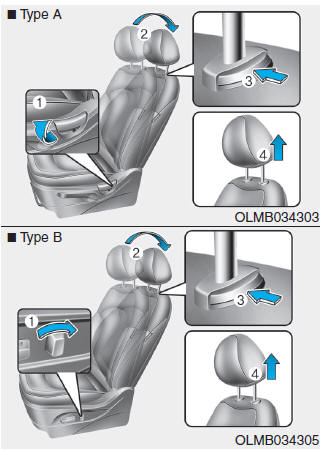
Removal/Reinstall
To remove the headrest:
1. Recline the seatback (2) with the recline lever or switch (1).
2. Raise headrest as far as it can go.
3. Press the headrest release button (3) while pulling the headrest up (4).
WARNING
NEVER allow anyone to ride in a seat with the headrest removed.
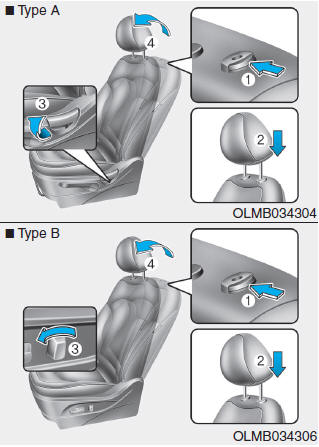
To reinstall the headrest :
1. Put the headrest poles (2) into the holes while pressing the release button (1).
2. Recline the seatback (4) with the recline lever or switch (3).
3. Adjust the headrest to the appropriate height.
WARNING
Always make sure the headrest locks into position after reinstalling and adjusting it properly.
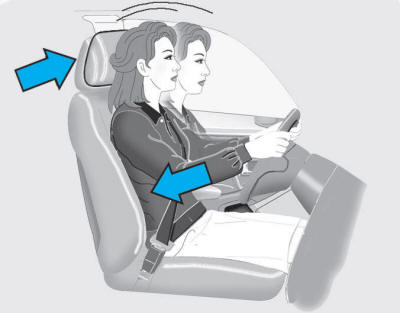
Active headrest
The active headrest is designed to move forward and upward during a rear impact. This helps prevent the driver's and front passenger’s heads from moving backward which helps minimize neck injuries.
WARNING
A gap between the seat and the headrest release button may appear when sitting on the seat or when you push or pull the seat. Be careful not to get your finger, etc. caught in the gap.
 Headrest
The vehicle’s front and rear seats have adjustable headrests.The headrests provide
comfort for passengers, but more importantly they are designed to help protect passengers
from whiplash and oth ...
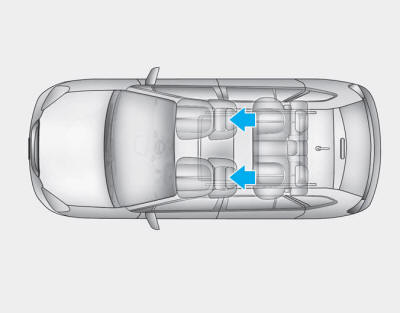
 Rear seat headrest
The rear seats are equipped with headrests in all the seating positions for the
passenger’s safety and comfort.
Adjusting the height up and down
To raise the headrest:
1. Pull it up to ...
Other information:
Hyundai Tucson (LM) 2010-2015 Service Manual: Rear Parking Assist System Control Unit Description and Operation
Description
When reversing, the driver is not easy to find objects in the
blind spots and to determine the distance from the object. In order to
provide the driver safety and convenience, back warning system will
operate upon shifting to "R" Ultrasonic sensor will emit ultrasonic wave
rea ...
Hyundai Tucson (LM) 2010-2015 Service Manual: Power Mosfet Repair procedures
Inspection
1.
Ignition "ON"
2.
2. Manually operate the control switch and measure the voltage of blower motor.
3.
Select the control switch to raise voltage until high speed.
Specification
FanMotor VoltageManualFirst speed4.0 ±0.5VSecond speed5.1 ±0.5VThird speed6.2 ±0.5VFourth spee ...
