Hyundai Tucson: Headrest / Rear seat headrest
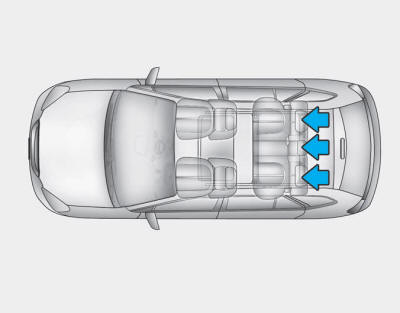
The rear seats are equipped with headrests in all the seating positions for the passengerŌĆÖs safety and comfort.
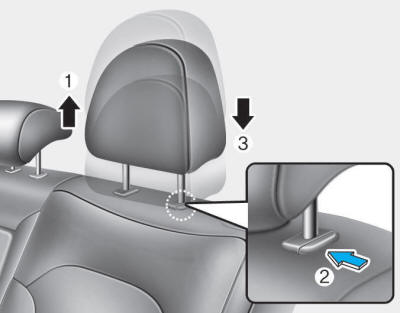
Adjusting the height up and down
To raise the headrest:
1. Pull it up to the desired position (1).
To lower the headrest:
1. Push and hold the release button (2) on the headrest support.
2. Lower the headrest to the desired position (3).
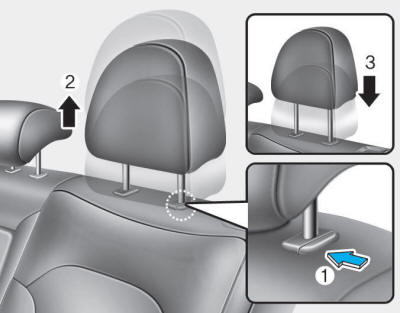
Removal/Reinstall
To remove the headrest:
1. Raise the headrest as far as it can go.
2. Press the release button (1) while pulling the headrest up (2).
WARNING
NEVER allow anyone to ride in a seat with the headrest removed.
To reinstall the headrest:
1. Recline the seatback.
2. Put the headrest poles (3) into the holes while pressing the release button (1).
3. Adjust the headrest to the appropriate height.
WARNING
Always make sure the headrest locks into position after reinstalling and adjusting it to properly protect the occupants.
 Front seat headrest
The driverŌĆÖs and front passengerŌĆÖs seats are equipped with adjustable headrests
for the passengers safety and comfort.
Adjusting the height up and down
To raise the headrest:
1. Pull ...
 Seat warmers
Seat warmers are provided to warm the seats during cold weather.
WARNING
The seat warmers can cause a SERIOUS BURN, even at low temperatures and especially
if used for long periods of time. Passen ...
Other information:
Hyundai Tucson (LM) 2010-2015 Service Manual: Fender Repair procedures
Replacement
ŌĆó
When removing and installing the hood, an assistant is necessary.
ŌĆó
Be careful not to damage the hood and body.
ŌĆó
When removing the clips, use a clip remover.
1.
Remove the front bumper.
(Refer to Bumper - ŌĆ£Front BunperŌĆØ )
2. ...
Hyundai Tucson (LM) 2010-2015 Service Manual: Compressor Oil Repair procedures
Oil Specification
1.
The HFC-134a system requires synthetic (PAG) compressor oil
whereas the R-12 system requires mineral compressor oil. The two oils
must never be mixed.
2.
Compressor (PAG) oil varies according to compressor model. Be sure to use oil specified for the model of compress ...
