
Hyundai Tucson: Lighting System / Head Lamps Repair procedures
Hyundai Tucson (LM) 2010-2015 Service Manual / Body Electrical System / Lighting System / Head Lamps Repair procedures
| Removal |
Head lamps become very hot during use; do not touch them or any attaching hardware immediately after they have been turned off. |

The headlamp bulb should not be removed from the headlamp assembly until just before a new bulb is installed.
Removing bulb for an extended period of time may affect headlamp bulb performance.
Contaminants may enter the headlamp assembly where they can settle on the lens and reflector.
Never turn on the head lamps with the bulb removed from the headlamp assembly. |

| 1. |
Disconnect the negative (-) battery terminal. |
| 2. |
Remove the front bumper.
(Refer to the Body - "Front Bumper") |
| 3. |
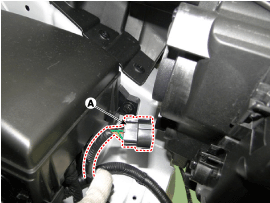
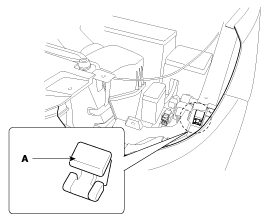
Disconnect the head lamp connector (A).
|
| 4. |
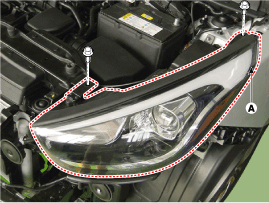
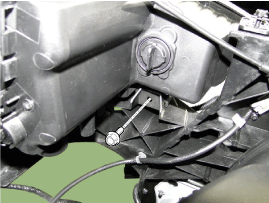
Remove the head lamp (A) after loosening the bolts.
|
| Installation |
| 1. |
Install the head lamp bulbs. |
| 2. |
Reassemble the head lamp bulb covers. |
| 3. |
Reassemble the head lamp assembly after connecting the lamp connector. |
| Replacement |
Turn the head lamp switch off to avoid high voltage
Be careful not to damage the bulb and use genuine bulbs only
|
Bulb (high/low)
| 1. |
Turn the head lamp switch off. |
| 2. |
Disconnect the power connector from the lamp. |
| 3. |
Remove the lamp assembly |
| 4. |
Remove the dust cover. |
| 5. |
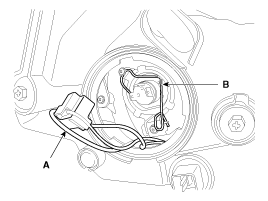
Remove the connector (A) from the bulb.
|
| 6. |
Remove the bulb clip (B) and bulb from the lamp assembly. |
| 7. |
Installation is the reverse of removal. |
Turn Signal Lamp & Position Lamp
| 1. |
Turn the head lamp switch off. |
| 2. |
Remove the lamp assembly. |
| 3. |
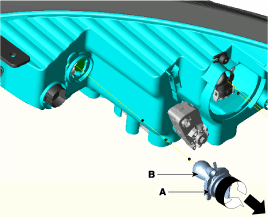
Turn the bulb socket (A) counterclockwise to remove the turn signal bulb (B)
|
| Adjustment |
Head Lamp Aiming Instructions
The head lamps should be aimed with the proper beam-setting
equipment, and in accordance with the equipment manufacturer's
instructions.
If there are any regulations pertinent to the aiming of head
lamps in the area where the vehicle is to be used, adjust so as to meet
those requirements. |
Alternately turn the adjusting gear to adjust the head lamp
aiming. If beam-setting equipment is not available, proceed as follows :
| 1. |
Inflate the tires to the specified pressure and remove any loads from the vehicle except the driver, spare tire, and tools. |
| 2. |
The vehicle should be placed on a flat floor. |
| 3. |
Draw vertical lines (Vertical lines passing through
respective head lamp centers) and a horizontal line (Horizontal line
passing through center of head lamps) on the screen. |
| 4. |
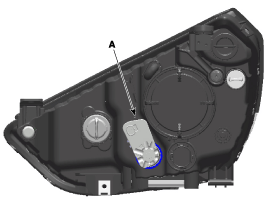
With the head lamp and battery in normal condition, aim the head lamps so the brightest portion falls on the vertical lines.
Make vertical (A) adjustments to the lower beam using the adjusting wheel.
|
Front Fog Lamp Aiming
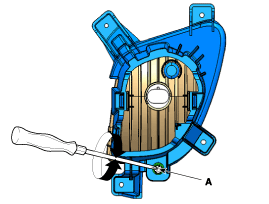
The front fog lamps should be aimed as the same manner of the head lamps aiming.
With the front fog lamps and battery normal condition, aim the front fog lamps by turning the adjusting gear (A).
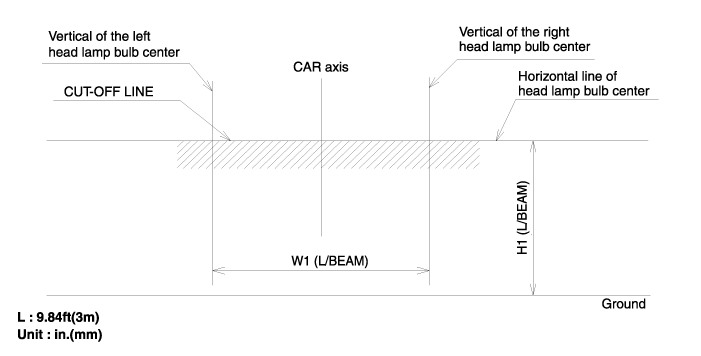
Head Lamp And Fog Lamp Aiming Point
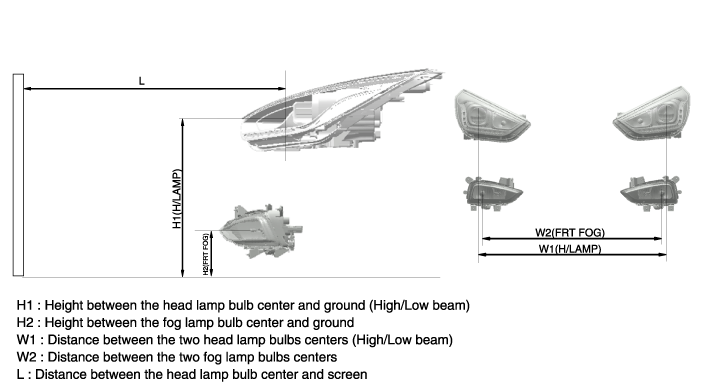

| 1. |
General Type
|
| 2. |
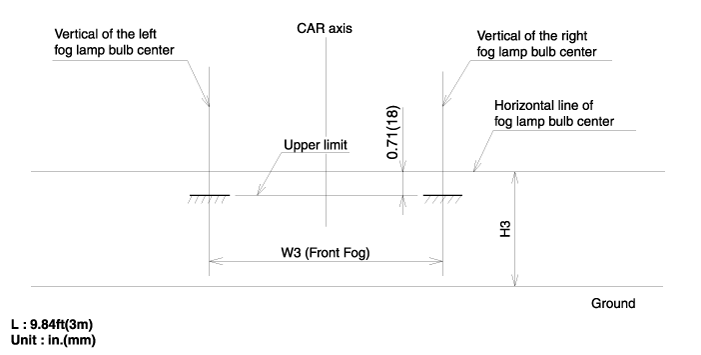
Turn the front fog lamp on with driver seated in the vehicle.
The cut-off line should be projected in the allowable range shown in the picture.
|
 Head Lamps Components and Components Location
Component (1)
1. Head lamp assembly lens and housing2. Head lamp high/low bulb3. Dust cover4. Trun signal lamp socket5. Turn signal lamp bulb6. Side marker lamp bulb
...
 Room Lamp Repair procedures
Inspection
1.
Remove the room lamp assembly connector (A) then check for continuity between terminals.
Removal
1.
Disconnect the negative (-) battery terminal.
2.
Detach the lamp lens (A) ...
Other information:
Hyundai Tucson (LM) 2010-2015 Service Manual: Start/Stop Button Repair procedures
Removal
1.
Disconnect the negative(-) battery terminal.
2.
Remove the left air vent.
(Refer to the BD group - "Crash pad")
3.
Disconnect the connector (A).
[LHD]
[RHD]
4.
Remove the start/stop button (A) after loosening the mounting screws.
[LHD]
[RHD]
Installation
1.
Ins ...
Hyundai Tucson (LM) 2010-2015 Owners Manual: High mounted stop light
1. Open the tailgate.
2. Gently remove the center cover of the rear tailgate trim.
3. Disconnect the electrical connector.
4. Loosen the retaining nuts and remove the spoiler.
5. Remove the high mounted stop light assembly (A) after loosening the nuts and
washer nozzle (B).
6. Reinstall a ...
© 2010-2026 www.htmanual.net
