Hyundai Tucson: Exterior / Hood Repair procedures
Hyundai Tucson (LM) 2010-2015 Service Manual / Body (Interior and Exterior) / Exterior / Hood Repair procedures
| Replacement |
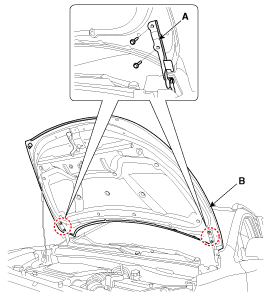
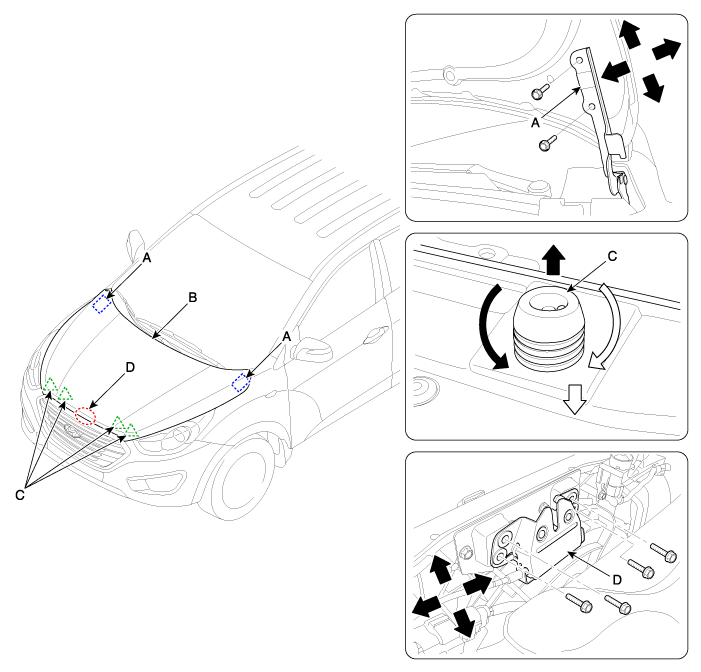
Hood Assembly Replacement
|

| 1. |
Loosen the hood hinge (A) mounting bolts, remove the hood (B).
|
| 2. |
Install in the reverse order of removal.
|
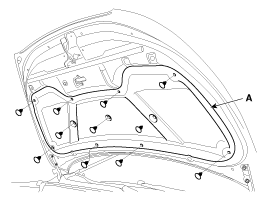
Hood Insulator Pad Replacement
|

| 1. |
Using a clip remover, remove the clips. |
| 2. |
Remove the hood insulator pad (A).
|
| 3. |
Install in the reverse order of removal.
|
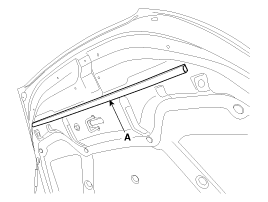
Hood Seal Weatherstrip Replacement
| 1. |
Detach the clips, then remove the hood weatherstrip (A).
|
| 2. |
Install in the reverse order of removal.
|
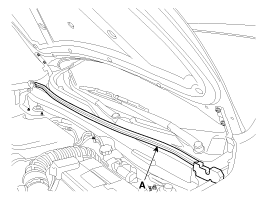
Hood Weatherstrip Replacement
| 1. |
Remove the hood weatherstrip (A).
|
| 2. |
Install in the reverse order of removal. |
Hood Latch Release Handle Replacement
| 1. |
Remove the hood release handle (A).
|
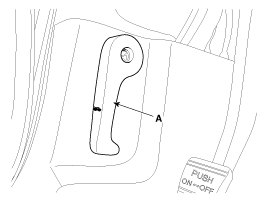
| 2. |
Install in the reverse order of removal.
|
Hood Latch Replacement
| 1. |
Loosen the hood latch (A) mounting bolts. |
| 2. |
Disconnect the hood latch cable (B) and release cable (C).
|
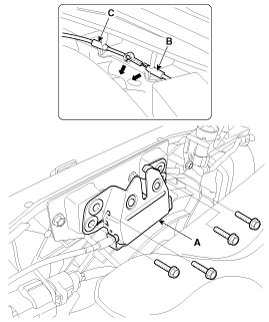
| 3. |
Install in the reverse order of removal.
|
| Adjustment |
Adjust Hood
| 1. |
After loosening the hinge (A) mounting bolt, adjust the hood (B) by moving it up or down, or right or left. |
| 2. |
Adjust the hood height by turning the hood over slam bumpers (C). |
| 3. |
After loosening the hood latch (D) mounting bolts, adjust the latch by moving it up or down, or right or left.
|
 Fender Repair procedures
Replacement
•
When removing and installing the hood, an assistant is necessary.
•
Be careful not to damage the hood and body.
•
When removing the clips, u ...
 Tail Gate Repair procedures
Replacement
Tail Gate Trim Replacement
•
When prying with a flat-tipped screwdriver, wrap it with
protective tape, and apply protective tape around the related parts, ...
Other information:
Hyundai Tucson (LM) 2010-2015 Owners Manual: Interior overview
1. Door lock/unlock button
2. Power window switches
3. Central door lock switch
4. Power window lock switch
5. Outside rearview mirror control switch
6. Fuel filler door release lever
7. Instrument panel illumination control switch
8. AWD Lock button
9. DBC button
10. ESC OFF button
11. ...
Hyundai Tucson (LM) 2010-2015 Owners Manual: Headlight welcome function
When the headlight switch is in the ON position or in the AUTO position and all
doors (and tailgate) are closed and locked, if you press the door unlock button
on the remote transmitter or smart key, the headlights will come on for about 15
seconds.
If the headlight switch is in the AUTO posi ...
© 2010-2026 www.htmanual.net
