Hyundai Tucson: Cooling System / Radiator Repair procedures
Hyundai Tucson (LM) 2010-2015 Service Manual / Engine Mechanical System / Cooling System / Radiator Repair procedures
| Inspection |
Radiator Cap Testing
| 1. |
Remove the radiator cap, wet its seal with engine coolant, and then install it on a pressure tester.
|
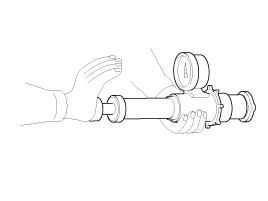
| 2. |
Apply a pressure of 93.16~122.58 kPa (0.95~1.25 kgf/cmx, 13.51~17.78 psi). |
| 3. |
Check for a drop in pressure. |
| 4. |
If the pressure drops, replace the cap. |
Radiator Leakage Test
| 1. |
Wait until engine is cool, then carefully remove the radiator
cap and fill the radiator with engine coolant, then install it on the
pressure tester.
|

| 2. |
Apply a pressure tester to the radiator and apply a pressure of 93.16~122.58 kPa (0.95~1.25 kgf/cmx, 13.51~17.78 psi). |
| 3. |
Inspect for engine coolant leaks and a drop in pressure. |
| 4. |
Remove the tester and reinstall the radiator cap.
|

| Removal and Installation |
| 1. |
Disconnect the battery negative terminal. |
| 2. |
Remove the air cleaner assembly.
(Refer to Intake and exhaust system in this group) |
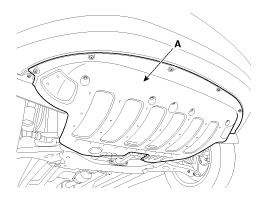
| 3. |
Remove the under cover (A).
|
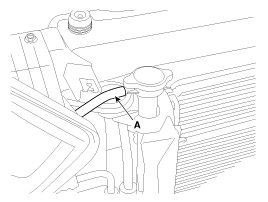
| 4. |
Loosen the drain plug (A), and drain the coolant.
Remove the radiator cap to speed draining.
|

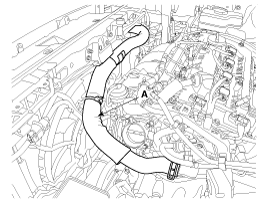
| 5. |
Remove the radiator upper hose (A).
|
| 6. |
Remove the radiator lower hose (A).
|
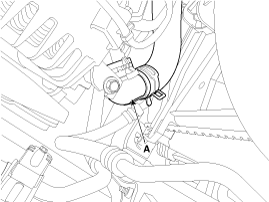
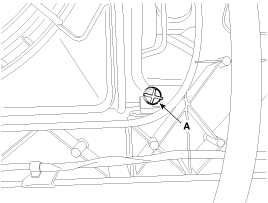
| 7. |
Disconnect the fan motor connector (A) and then remove the cooling fan assembly.
|
| 8. |
Remove the front bumper.
(Refer to Body - "Front Bumper") |
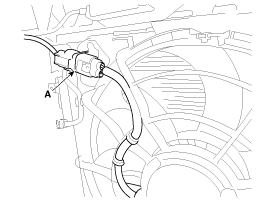
| 9. |
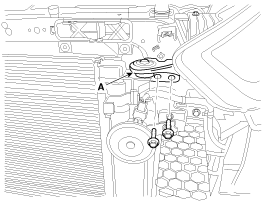
Disconnect the over flow hose (A) from the radiator.
|
| 10. |
Remove the cover (A) and the air guard (B) and then separate the condenser from the radiator.
|
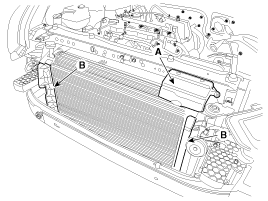
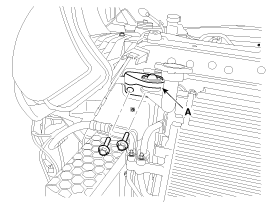
| 11. |
Remove the radiator mounting bracket (A) and then pull the radiator upper from vehicle.
|
| 12. |
Installation is in the reverse order of removal. |
| 13. |
Fill the radiator with coolant and check for leaks.
|
 Radiator Components and Components Location
Components
1. Cooling fan & shroud2. Radiator3. Radiator upper hose4. Radiator lower hose5. Mounting insulator6. Reservoir tank7. Fan motor
...
 Water pump Components and Components Location
Components
1. Water pump pulley2. Water pump3. Water pump gasket4. Water inlet fitting5. Thermostat6. Water temperature control assembly7. Engine coolant temperature sensor8. Bypass hose9. He ...
Other information:
Hyundai Tucson (LM) 2010-2015 Service Manual: PDM Relay Box Description and Operation
Description
The PDM relay is united with IG1, IG2 and ACC relays and installed beside the assist instrument panel. ...
Hyundai Tucson (LM) 2010-2015 Service Manual: Fuel Pressure Control Valve Specifications
Specification
ItemSpecificationCoil Resistance (x)0.5 [20°C(68°F)
...
© 2010-2026 www.htmanual.net
