Hyundai Tucson: Rear Suspension System / Rear Cross Member Repair procedures
Hyundai Tucson (LM) 2010-2015 Service Manual / Suspension System / Rear Suspension System / Rear Cross Member Repair procedures
| Replacement |
| 1. |
Remove the rear wheel & tire.
|

| 2. |
Remove the parking brake cable.
(Refer to the BR group) |
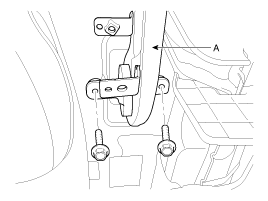
| 3. |
Loosen the bolt and then remove the trailing arm (A).
|
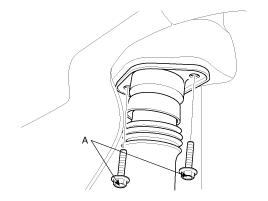
| 4. |
Loosen the shock absorber mounting bolts (A).
|
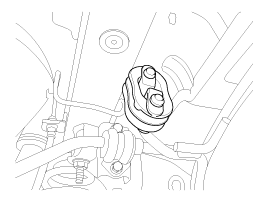
| 5. |
Remove the rear muffler.
|
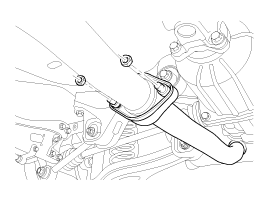
| 6. |
Loosen the bolt and then remove the propellar shaft.
[4WD]
|
| 7. |
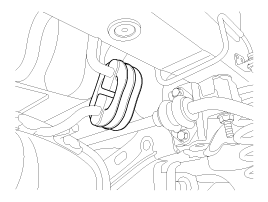
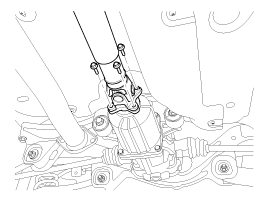
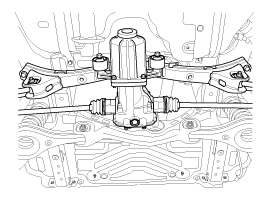
Loosen the mounting bolts and then remove the rear cross member with the frame.
[4WD]
|
| 8. |
Remove the rear lower arm.
(Refer to the lower arm) |
| 9. |
Remove the rear shock absorber.
(Refer to the rear shock absorber) |
| 10. |
Remove the rear upper arm.
(Refer to the rear upper arm) |
| 11. |
Remove the trailing arm.
(Refer to the trailing arm) |
| 12. |
Remove the rear assist arm.
(Refer to the rear assist arm) |
| 13. |
Remove the drive shaft. [4WD] |
| 14. |
Remove the differential carrier. [4WD] |
| 15. |
Installation is the reverse of removal. |
 Trailing Arm Repair procedures
Replacement
1.
Remove the rear wheel & tire.
Tightening torque :
88.3 ~ 107.9 N.m (9.0 ~ 11.0 kgf.m, 65.1 ~ 79.6 lb-ft)
Be careful not to damage to the hub bolts w ...
 Rear Coil Spring Repair procedures
Removal
1.
Remove the rear wheel & tire.
Tightening torque :
88.3 ~ 107.9 N.m (9.0 ~ 11.0 kgf.m, 65.1 ~ 79.6 lb-ft)
Be careful not to damage to the hub bolts when ...
Other information:
Hyundai Tucson (LM) 2010-2015 Service Manual: Injector Specifications
Specification
ItemSpecificationCoil Resistance (x)1.5 [20°C(68°F)]
...
Hyundai Tucson (LM) 2010-2015 Service Manual: Underdrive Brake Control Solenoid Valve(UD/B_VFS) Repair procedures
Inspection
1.
Turn ignition switch OFF.
2.
Disconnect the solenoid valve connector.
3.
Measure resistance between sensor signal terminal and sensor ground terminal.
4.
Check that the resistance is within the specification.
Removal
Replacing an on/off soleno ...
© 2010-2026 www.htmanual.net
