Hyundai Tucson: Electric Power Steering / Steering Gear box Repair procedures
Hyundai Tucson (LM) 2010-2015 Service Manual / Steering System / Electric Power Steering / Steering Gear box Repair procedures
| Replacement |
| 1. |
Remove the front wheel & tire.
|

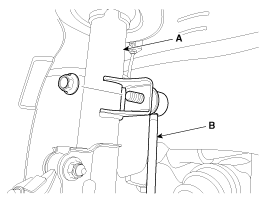
| 2. |
Disconnect the stabilizer link (B) with the front strut assembly (A) after loosening the nut.
|
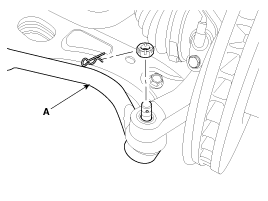
| 3. |
Remove the sprit pin and castle nut and then disconnect the tie-rod end (A) from the front knuckle.
|

| 4. |
Loosen the bolt & nutand then remove the lower arm (A).
|

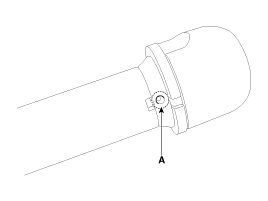
| 5. |
Loosen the nut and then remove the dust cover (A).
|
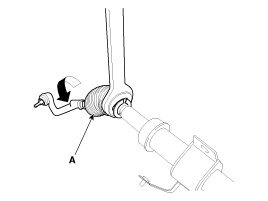
| 6. |
Loosen the bolt (A) and then disconnect the universal joint assembly from the pinion of the steering gear box.
|
| 7. |
Loosen the bolt (A) & nut (B) and then remove the roll rod stopper.
|
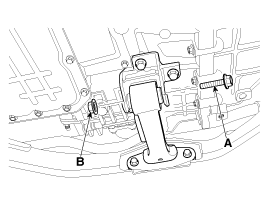
| 8. |
Disconnect the muffler rubber hanger (A).
|
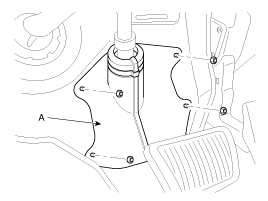
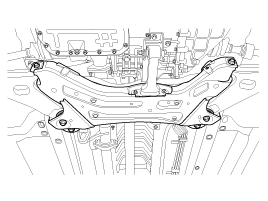
| 9. |
Loosen the bolts & nuts and then remove the sub frame.
|
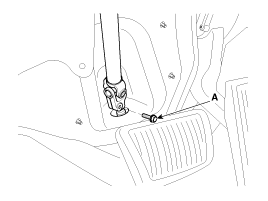
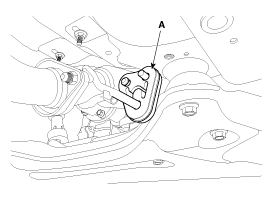
| 10. |
Loosen the bolt & nut and then remove the protactor (A).
|
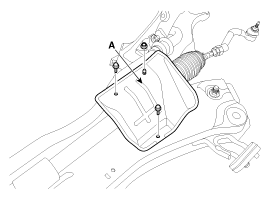
| 11. |
Loosen the bolt and then remove the stabilizer (A) from the sub frame.
|
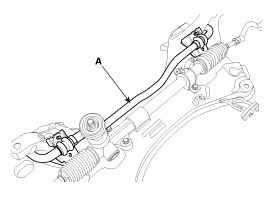
| 12. |
Loosen the bolt and then remove the steering gear box (A).
|
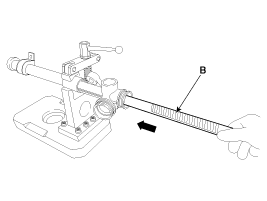
| 13. |
Installation is the reverse of the removal. |
| Disassembly |
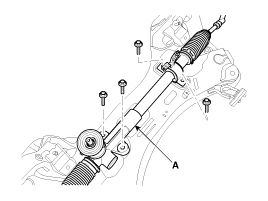
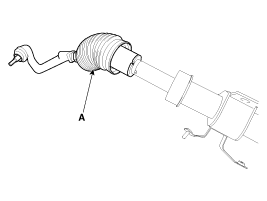
| 1. |
Fix the steering gear box assembly (A) on the vice.
|

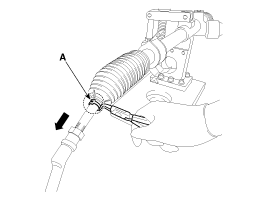
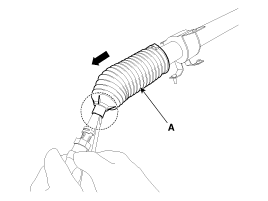
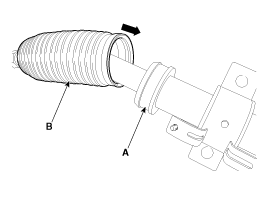
| 2. |
Remove the bellows clip (A) in the direction of the arrow. (The left and right same work.)
|
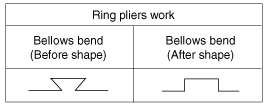
| 3. |
Give space to bellows bend (B) by using the ring pliers (A). (The left and right same work)
|

| 4. |
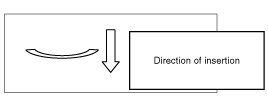
After making the space to the bellows and tie-rod end contact
part by using the (-) driver, remove the bellows (A) in the direction
of the arrow. (The left and right same work)
|
| 5. |
Remove the tie-rod & tie-rod end assembly (A). (The left and right same work)
|
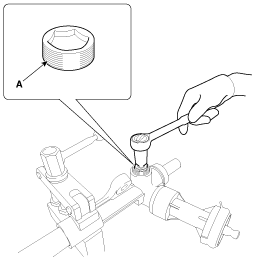
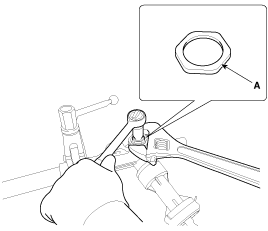
| 6. |
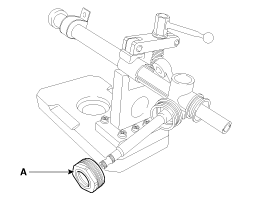
After fixing the yoke plug (A), remove the rock nut (B).
|


| 7. |
Remove the yoke plug (A).
|
| 8. |
Remove the yoke spring (A) and leaf spring (B).
|
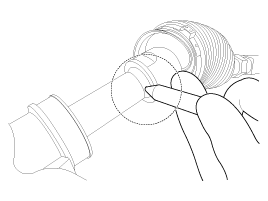
| 9. |
Remove the support yoke assembly (A) from the inner lack hosing.
|
| 10. |
Remove the dust packing & cap (A).
|
| 11. |
Remove the top plug (A) by using the spanner.
|

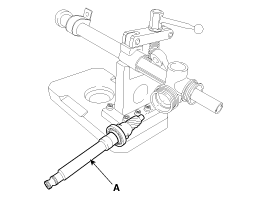
| 12. |
Remove the pinion assembly (A).
|
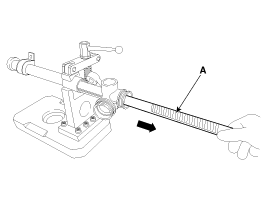
| 13. |
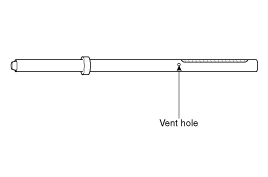
Remove the rack bar (A) in the direction of the arrow.
|
| Reassembly |
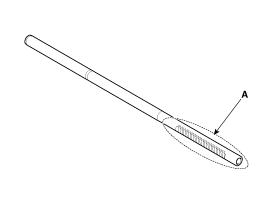
| 1. |
After spreading grease on the rack bar gear part (A), install rack bar (B) in the direction of the arrow.
|
| 2. |
After spreading grease on the pinion gear part, install the pinion assembly (A).
|
| 3. |
After spreading three bond (Loctite) on the top plug (A) thread, install the top plug by using the spanner.
|
| 4. |
Install the dust packing & cap (A).
|
| 5. |
Install the support yoke (A).
|
| 6. |
Install the Yoke plug (A) and leaf spring (B).
|
| 7. |
After spreading three bond (Loctite) on the Yoke plug (A) thread, install the Yoke plug.
|
| 8. |
Adjust Yoke with reference to the “How to adjust Yoke”.
(Refer to Electric Power Steering - "Steering Gear Box") |
| 9. |
After fixing the yoke plug, install the rock nut (A).
|
| 10. |
Install the tie-rod & tie-rod end assembly (A). (The left and right same work)
|
| 11. |
Caulk (A) the rack bar and tie-rod assembly joints. (The left and right same work)
|
| 12. |
After spreading sealant on the rack hosing and the bellow joints (A), install the bellows (B) in the direction of the arrow.
|
| Inspection |
| 1. |
Rack bar
|
| 2. |
Pinion assembly
|
| 3. |
Check the inside of rack housing for damage. |
| 4. |
Check the bellows for being torn. |
 Steering Gear box Components and Components Location
Components
1. Tie rod end2. Lock nut3. Bellows 4. Bellows band5. Tie rod6. Rack bar 7. Dust packing 8. Dust cap 9. Oil seal10. Pinion plug11. Pinion assembly12. Yoke plug13. Yoke spring14. Suppo ...
 Restraint
...
Other information:
Hyundai Tucson (LM) 2010-2015 Owners Manual: Starting the engine
WARNING
Always wear appropriate shoes when operating your vehicle. Unsuitable shoes,
such as high heels, ski boots, sandals, flipflops, etc., may interfere with your
ability to use the brake, accelerator and clutch pedals.
1.Make sure the parking brake is applied.
2.Make sure the shift lever ...
Hyundai Tucson (LM) 2010-2015 Service Manual: Oil hydraulic Motor(Actuator) Description and Operation
Description
The 4WD ECM controls the Pump Motor Pump (Actuator) to
generating an oil pressure. The pressure engages a multiple disk clutch
to transfer torque to the rear wheels. The torque to the rear wheels
varies according to the pressure on the clutch. ...
© 2010-2026 www.htmanual.net
