
Hyundai Tucson: CD Player : AC110TMKN, AC1B0TMKN, AC1B1TMAN / XM Radio
Using XM satelliteâ„¢ Radio
Your vehicle is equipped with a 3 month complimentary period of XM Satelliteâ„¢ Radio. XM provides access to over 130 channels of music, information, and entertainment programming.
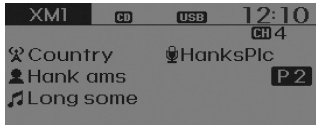
Seek
Press the  key
key
- Shortly pressing the key: select previous or next channel.
- Pressing and holding the key (over 0.8 seconds): continuously move to previous or next channel.
� If the “Category� icon is displayed, channels are changed within the current category.
Scan
Press the  key
key
Shortly pressing the key: Previews each broadcast for 5 seconds each
� Press the  key again to continue listening to the current frequency
� If the “Category� icon is displayed, channels are changed within the current category.
Category
Press the  /
/  key
key
 Set through the
 TUNE knob
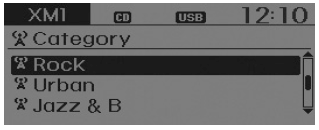
- The display will indicate the category menus, highlight the category that the current channel belongs to.
- In the Category List Mode, press the
 /
/
 key to
navigate category list.
key to
navigate category list. - Press the tune knob to select the lowest channel in the highlighted category.
� If channel is selected by selecting category, then the “CATEGORY� icon is displayed at the top of the screen.
Preset
Press the  ~
~  key
key
- Shortly pressing the key: Plays the frequency saved in the corresponding key.
- Pressing and holding the key (over 0.8 seconds): Pressing and holding the
desired key from
 ~
~  will save the current broadcast to the selected key and sound a BEEP.
Tune
- Rotate
 TUNE knob : Changes the channel number or scrolls category list.
 - Press
 TUNE knob : Selects the menu.
Menu
Select category menu through the  TUNE knob
  Press the
  key
key  Select [
  Info]
through the
Info]
through the  TUNE knob or
  key
key
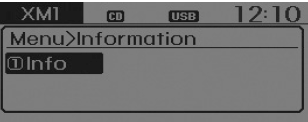
Info (Information)
Displays the Artist/Song info of the current song.
 Radio : FM, AM OR XM
Seek
Press the
key
Shortly pressing the key (under 0.8 seconds): Changes the frequency.
Pressing and holding the key (over 0.8 seconds): Automatically searches
for the next frequen ...
 Basic method of use
Audio CD / MP3 CD / USB / iPod® / My Music
Press the
key to change
the mod mode in order of CD ➟ USB(iPod®) ➟ AUX ➟ My Music ➟ BT Audio.
The folder/file name is displayed on the scree ...
Other information:
Hyundai Tucson (LM) 2010-2015 Service Manual: Output Speed Sensor Repair procedures
Inspection
1.
Check signal waveform of Input & output speed sensor using the GDS.
Specification: Refer to "Signal Wave Form" section.
Removal
1.
Remove the valve body assembly.
(Refer to Hydraulic System - "Valve Body")
2.
Disconnect the input & output speed sensor conn ...
Hyundai Tucson (LM) 2010-2015 Owners Manual: Remote key
To lock the doors, press the Door Lock button (1) on the remote key.
Press the Door Unlock button (2) on the remote key, the driver’s door will unlock.
If you press the Door Unlock button on the remote key again within four seconds,
then all the doors will unlock.
Once the doors are unlo ...
