Hyundai Tucson: Intake And Exhaust System / Muffler Repair procedures
Hyundai Tucson (LM) 2010-2015 Service Manual / Engine Mechanical System / Intake And Exhaust System / Muffler Repair procedures
| Removal and Installation |
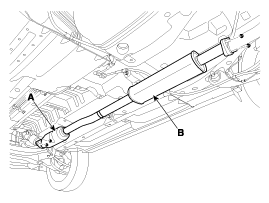
Front Muffler
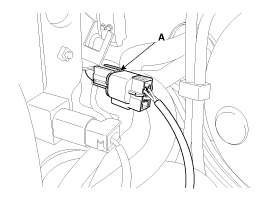
| 1. |
Disconnect the front oxygen sensor connector (A) and then remove it from the bracket.
|
| 2. |
Remove the front muffler (B).
|

| 3. |
Install in the revers order of removal. |
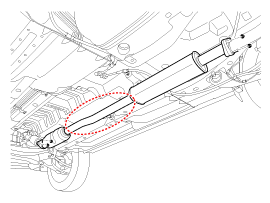
Center Muffler
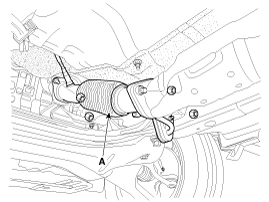
| 1. |
Remove the heated oxygen sensor (A).
|
| 2. |
Remove the catalytic converter and the center muffler (B).
|
| 3. |
Install in the revers order of removal. |
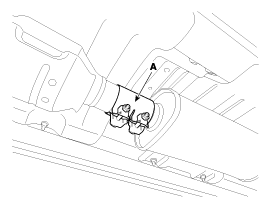
Main Muffler
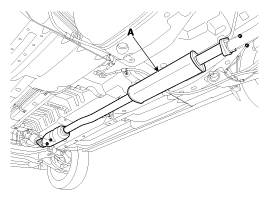
| 1. |
Remove the main muffler (A).
|
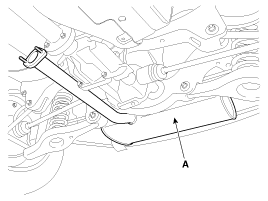
| 2. |
Install in the revers order of removal. |
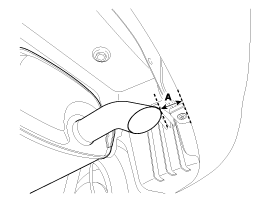
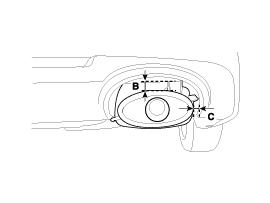
Replacement procedure of center muffler using clamp
Under warranty : Replace the center muffler assembly.
Out of warranty : It is available to replace the center muffler as the procedure below.
| 1. |
Check that the clamping part of the center muffler assembly is damaged or deformed.
If the muffler is too corroded to clamp, replace the center muffler assembly.
|
| 2. |
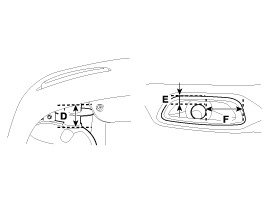
Record the gap (A, B, C, D, E, F) between the tail pipe (or tail trim) and the rear bumper.
[Pipe type]
[Trim type]
[Bumper-integrated trim type]
|
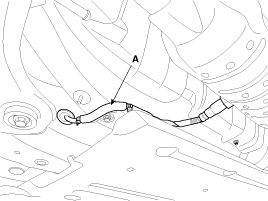
| 3. |
Remove the catalytic converter & center muffler (A).
|
| 4. |
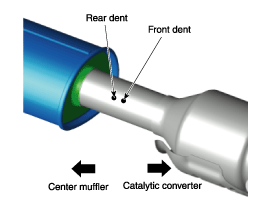
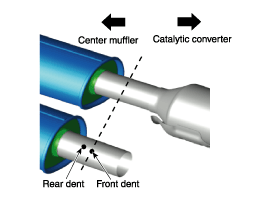
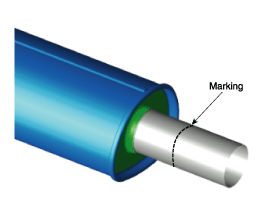
Cut the center muffler as the instruction below.
[With dent]
[Without dent]
[A/S muffler]
|


| 5. |
Install the center muffler.
|
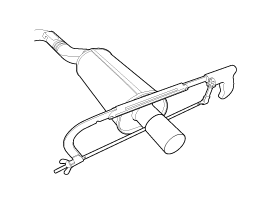
 Muffler Components and Components Location
Components
1. Front muffler2. Catalytic converter & center muffler assembly3. Main muffler4. Gasket5. Hanger
...

Other information:
Hyundai Tucson (LM) 2010-2015 Service Manual: Rear Shock Absorber Components and Components Location
Components
1. Self locking nut2. Bracket assembly3. Bumper rubber4. Dust cover5. Shock absorber
...
Hyundai Tucson (LM) 2010-2015 Owners Manual: Low tire pressure indicator
The low tire pressure indicator comes on for 3 seconds after the ignition switch
is turned to the "ON" position.
The low tire pressure indicator illuminates when one or more of your tires is
significantly underinflated.
The low tire pressure indicator will illuminate after it blinks for appr ...
© 2010-2026 www.htmanual.net
