Hyundai Tucson: Rear Suspension System / Rear Lower Arm Repair procedures
Hyundai Tucson (LM) 2010-2015 Service Manual / Suspension System / Rear Suspension System / Rear Lower Arm Repair procedures
| Replacement |
| 1. |
Remove the rear wheel & tire.
|

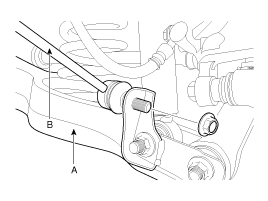
| 2. |
Loosen the nut and then remove the rear stabilizer link (B) with the rear lower arm (A).
[4WD]
[2WD]
|
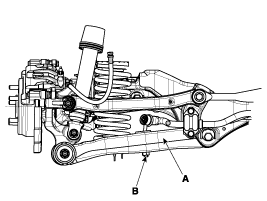
| 3. |
Loosen the bolt & nut and then remove the rear lower arm (A) with the rear axle.
|
| 4. |
Loosen the bolt & nut and then remove the rear lower arm (B) with the sub frame (A).
|
| 5. |
Installation is the reverse of removal. |
| Inspection |
| 1. |
Check the bushing for wear and deterioration. |
| 2. |
Check the rear lower arm for deformation. |
| 3. |
Check the coil spring and spring pad for deterioration and deformation. |
| 4. |
Check for all bolts and nut. |
 Rear Upper Arm Repair procedures
Replacement
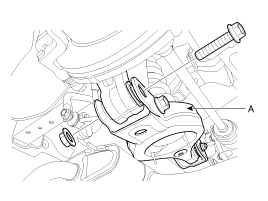
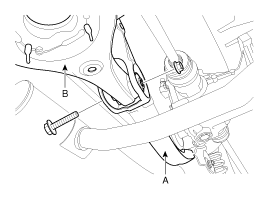
1.
Remove the rear wheel & tire.
Tightening torque :
88.3 ~ 107.9N.m (9.0 ~ 11.0kgf.m, 65.1 ~ 79.6lb-ft)
Be careful not to damage to the hub bolts when ...
 Rear Stabilizer Bar Repair procedures
Replacement
1.
Remove the rear wheel & tire.
Tightening torque :
88.3 ~ 107.9N.m (9.0 ~ 11.0kgf.m, 65.1 ~ 79.6lb-ft)
Be careful not to damage to the hub bolts when ...
Other information:
Hyundai Tucson (LM) 2010-2015 Service Manual: Components and Components Location
Component Location
1. Driver power window switch2. Assist power window switch3. SJB (Smart Junction Box)4. Door lock switch5. Liftgate lock actuator & switch6. Front door lock actuator & switch7. Rear door lock actuator & switch
...
Hyundai Tucson (LM) 2010-2015 Service Manual: Schematic Diagrams
System Block Diagram
Component Parts And Function Outline
Component partFunctionVehicle-speed sensorConverts vehicle speed to pulse.ECMReceives signals from sensor and control switches.Cruise control indicatorIlluminate when CRUISE main switch is ON (Built into cluster)Cruise Control switchesON/ ...
© 2010-2026 www.htmanual.net
